Month: May 2025

  • How to Export Gmail Emails to EML Format?- A Stepwise Guide

    Gmail is a prominent email client worldwide in small and large organizations. For some reason, most users want to export Gmail emails to EML format. Therefore, users should focus on this professional write-up to understand different approaches to saving or downloading Gmail emails to EML files.

    Whether you want to take your Gmail emails to EML for migration purposes or for any other legal reasons, applying an easy solution is a must. We know the EML format is supported by almost every email client. So, it is an easy and instant way for users to export or download Gmail emails to EML file format to move emails to another mail client.

    We will elaborate on two solutions: a manual method and an automated Gmail backup tool to save emails from Gmail accounts to EML file formats. Know the stepwise working procedure and find the easiest way to save emails from Gmail to EML files by reading this write-up.

    Table of Content

    What are the advantages of saving Gmail emails to EML format?

    EML format is widely supported by various email clients, including Incredimail, Thunderbird, Microsoft Outlook, Apple Mail, etc. That is why it becomes beneficial for users to export Gmail emails to EML file formats; let us understand some of them.

    • When users export Gmail emails to EML format, it helps them to quickly move their data to other email clients that support EML format.
    • Moreover, users can also access their email offline if they have all their Gmail emails in EML format.
    • Having Gmail emails to EML files allows users to avoid unexpected future chaos and securely keep a backup of their emails.
    • As an EML file stores a single email, it is easy for users to share with others.
    • The EML file is organized in folders and sub-folders, giving better control over the emails even without the internet.

    These are the benefits of why users look to export Gmail emails to EML file format. Now, we will focus on the possible solutions to effectively save Gmail email to EML format.

    Ways to save Gmail email to EML file format

    Here, we look at the manual and professional third-party solutions. In the manual method, we use the Gmail email client to download Gmail email to EML format. Then, we will share an alternative solution, the Shoviv Gmail Backup and Restore Tool, to accomplish this task rapidly.

    Now, we first explore the manual method of exporting Gmail emails to EML formats using the Google Gmail web-based application.

    1. A manual way to download Gmail emails to EML files

    This method will help only download a single email to EML format at once. However, the steps are easy, and even new users can follow them without any hassle to export Gmail emails to EML formats. Let us share the stepwise guide:

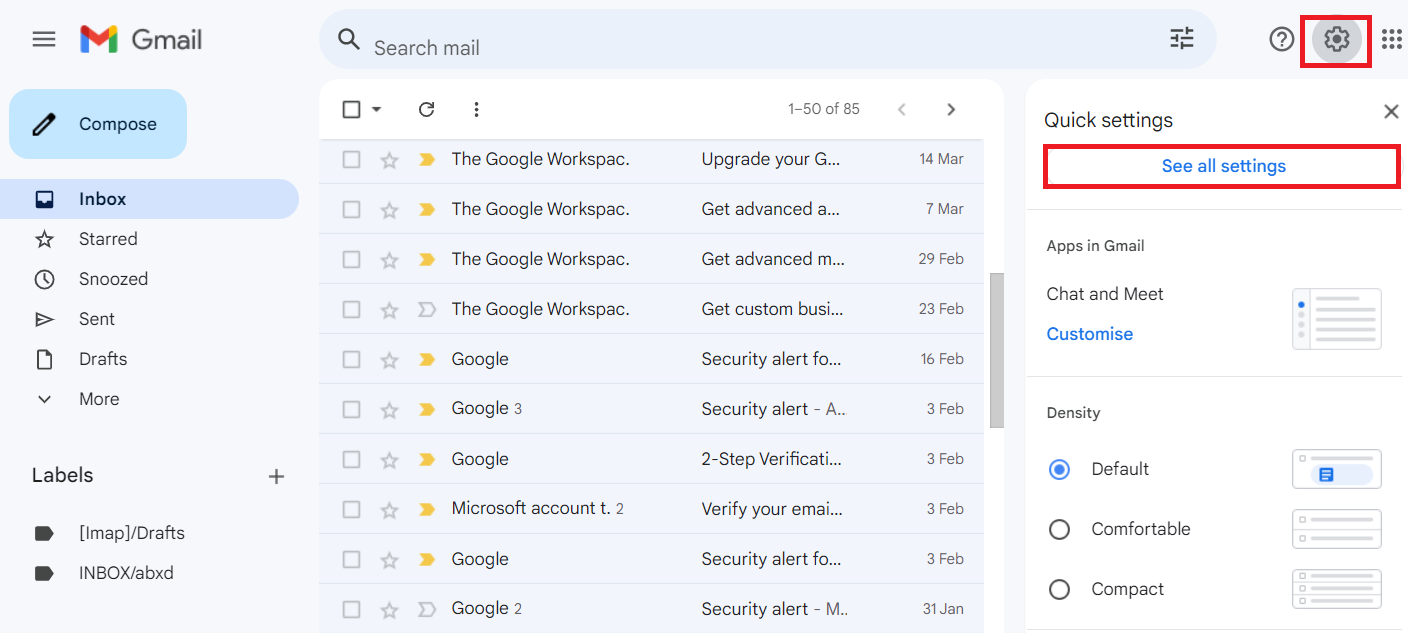
    • Go to your web browser, search for Gmail and login to your account.
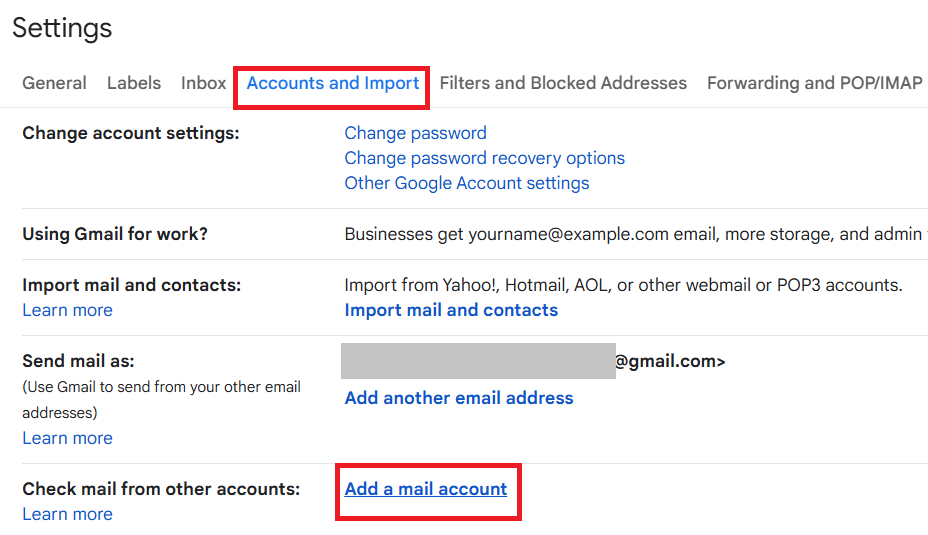
    • Then, navigate to the folder and open the email that you want to export in EML file format.
    • After that, tap the three dots and hit the Download message button from the options.

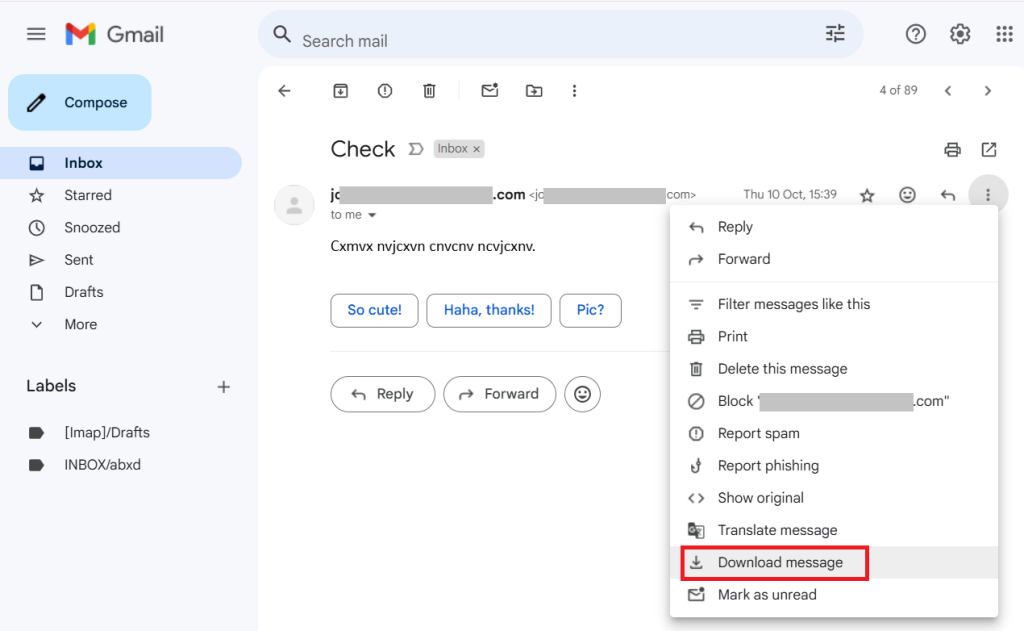
    These simple steps will take your Gmail email into EML format. Before using this solution, note that you can only save a single email to EML format at a time.

    Limitation: Suppose you have 1,000,000 emails to save into EML format; then you need to repeat these steps 1,000,000 times to download all Gmail emails to EML files. So, this process can become time-consuming and confusing for users when using the manual solution.

    Let us move to the alternative tool for exporting Gmail emails to EML format without any hurdle.

    2. Shoviv Gmail Backup and Restore Tool to save Gmail email to EML format

    Users can use the Shoviv Gmail Backup and Restore Tool to export Gmail emails to EML without any limitation. This software allows users to export Gmail emails into various file formats, including EML, PST, MSG, MHT, etc. It works on the job-based process, allowing users to process multiple backup/restore jobs at once.

    This software also allows users to save their Gmail emails in PST format without any limitations on size and email count. New users can also save Gmail emails in EML format using this professional software.

    It offers a filter option that users can use to choose selected items from Gmail using the date and folder criteria. This tool also has a default incremental export feature to resume the interrupted process and prevent data from duplicating items.

    Guide for exporting Gmail emails to EML file format

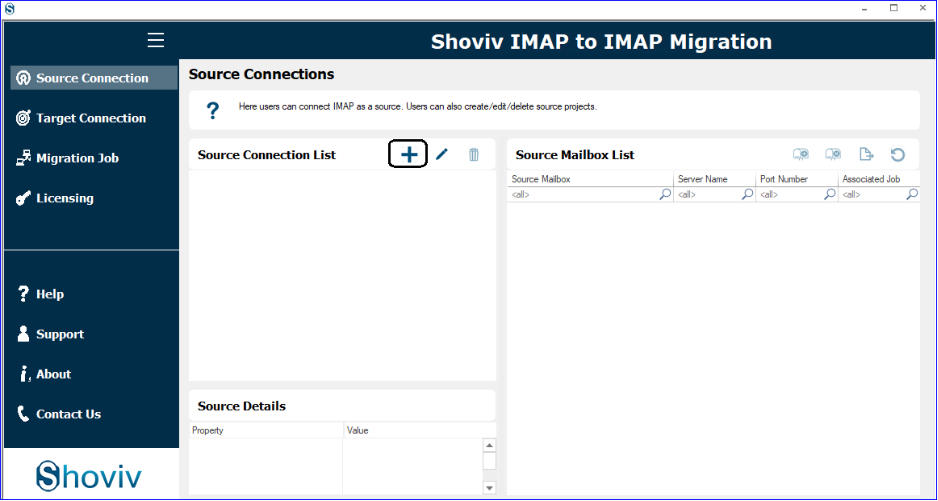
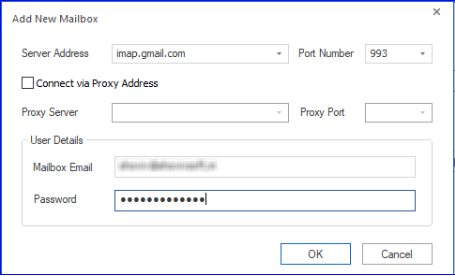
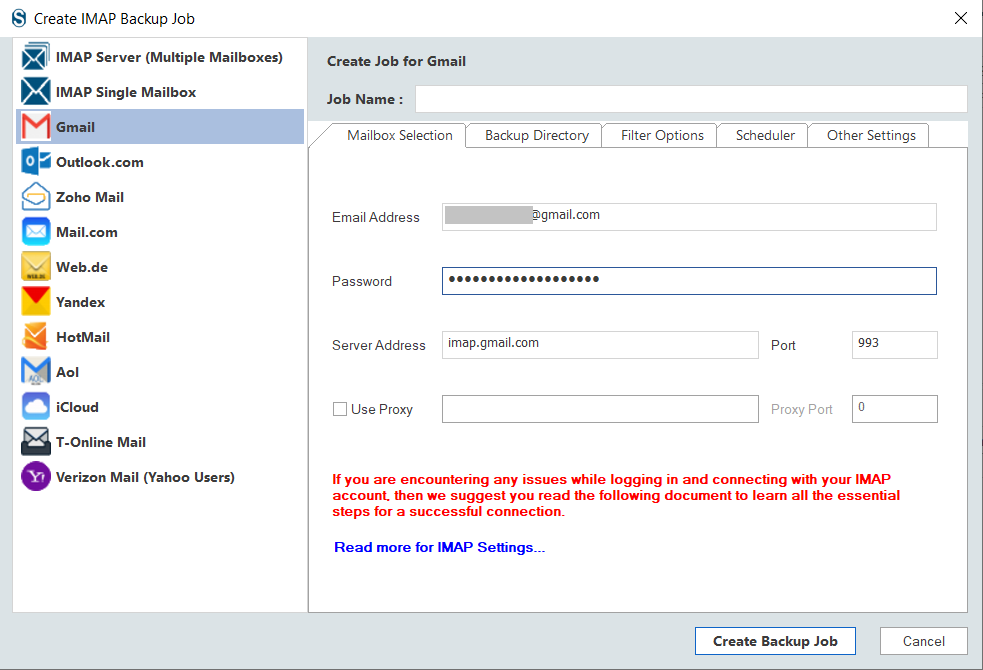
    • Open the Shoviv IMAP Backup and Restore Tool (Shoviv Gmail Backup Tool).
    • Then, select Gmail from the left-side options.
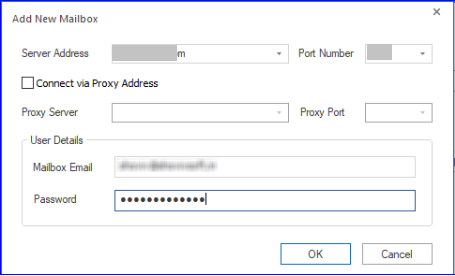
    • Enter your Gmail address and App Password. (click here to learn how to create an App Password)
    Create a backup for for Exporting Gmail Emails to EML file format
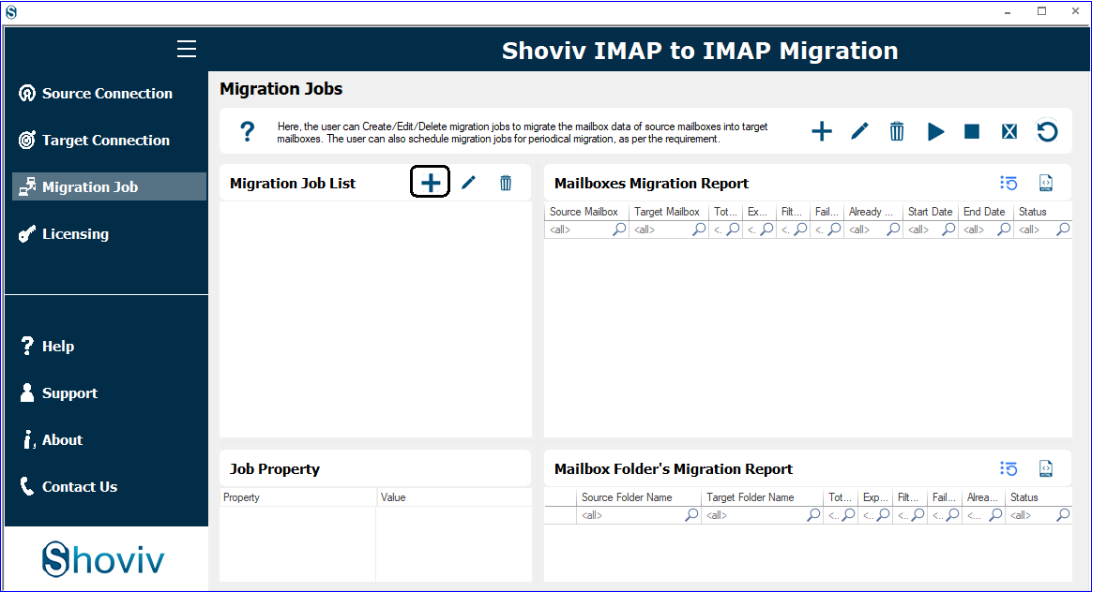
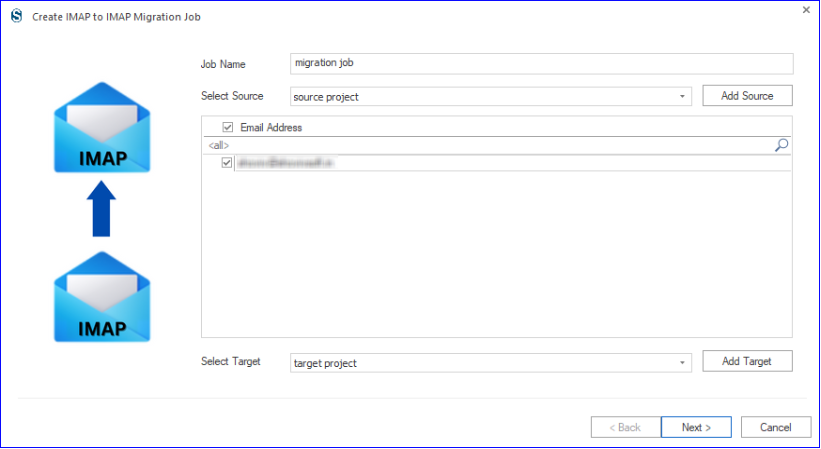
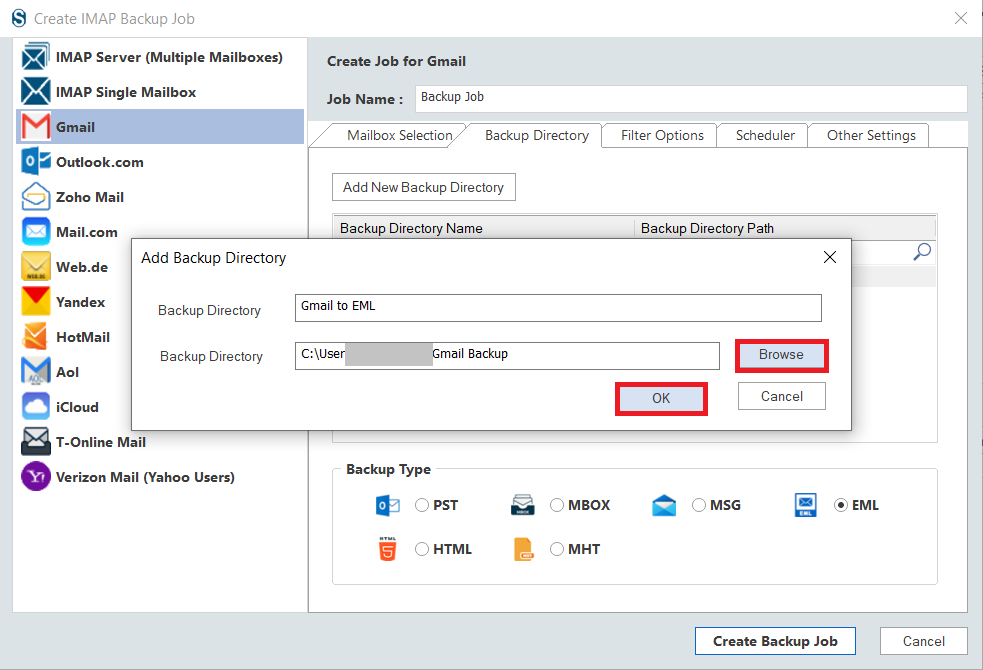
    • Click the Backup Directory button, enter the job name, select EML file format from the options below, and hit the Add new Backup Directory option.
    Choose Export format
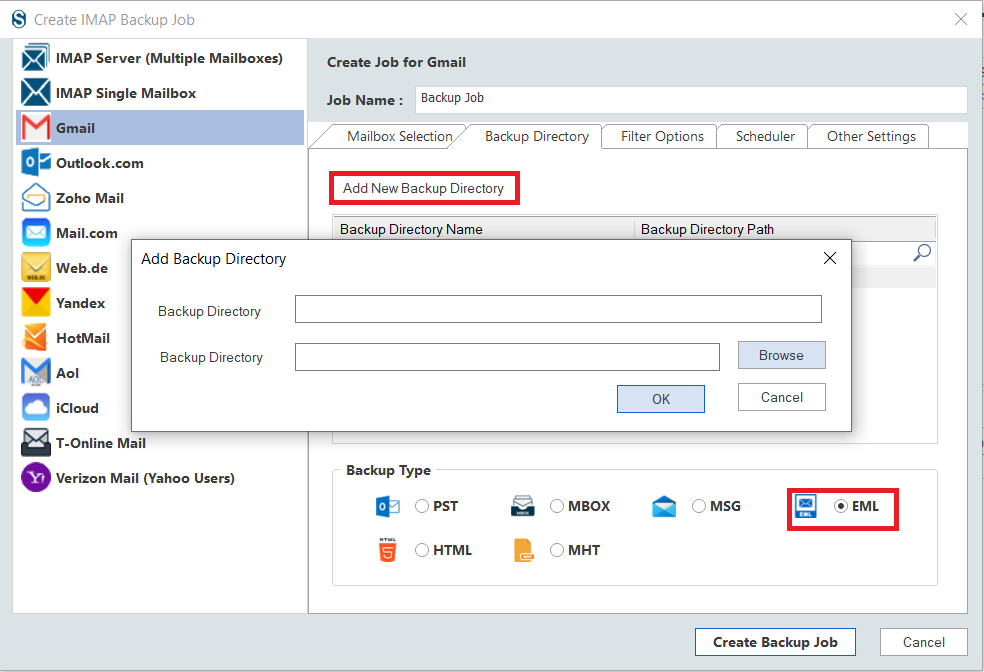
    • Give a name to the Backup Directory and tap the Browse button to select the location where you want to save the resultant EML files. Then, click the Ok button.
    Backup directory name and path
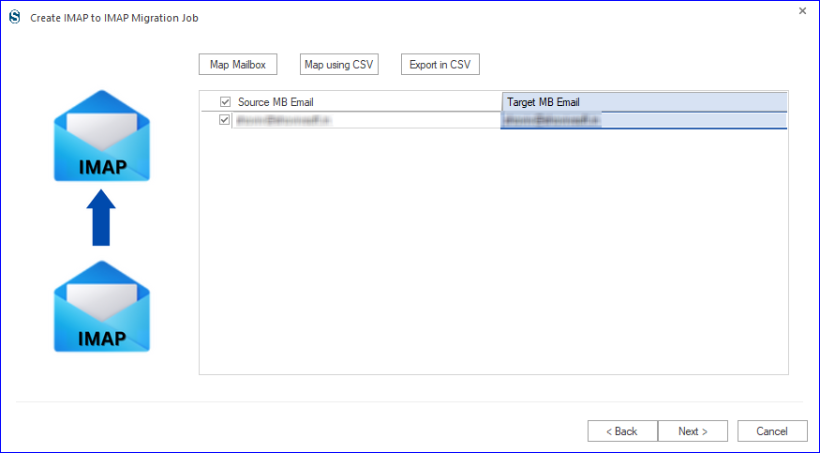
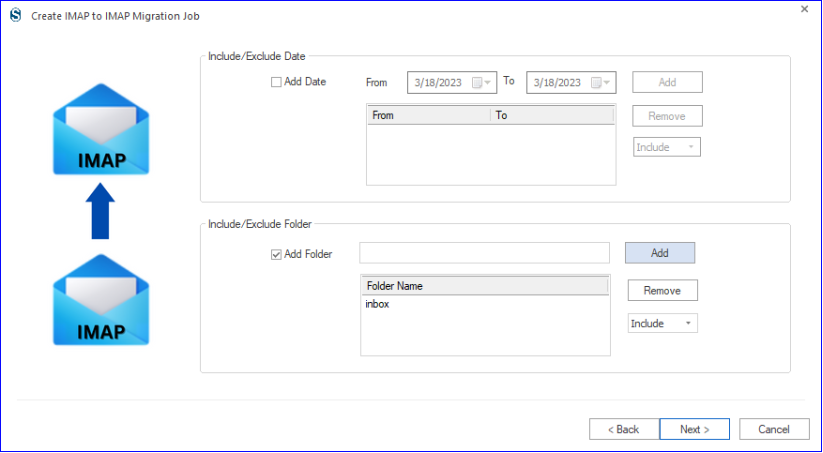
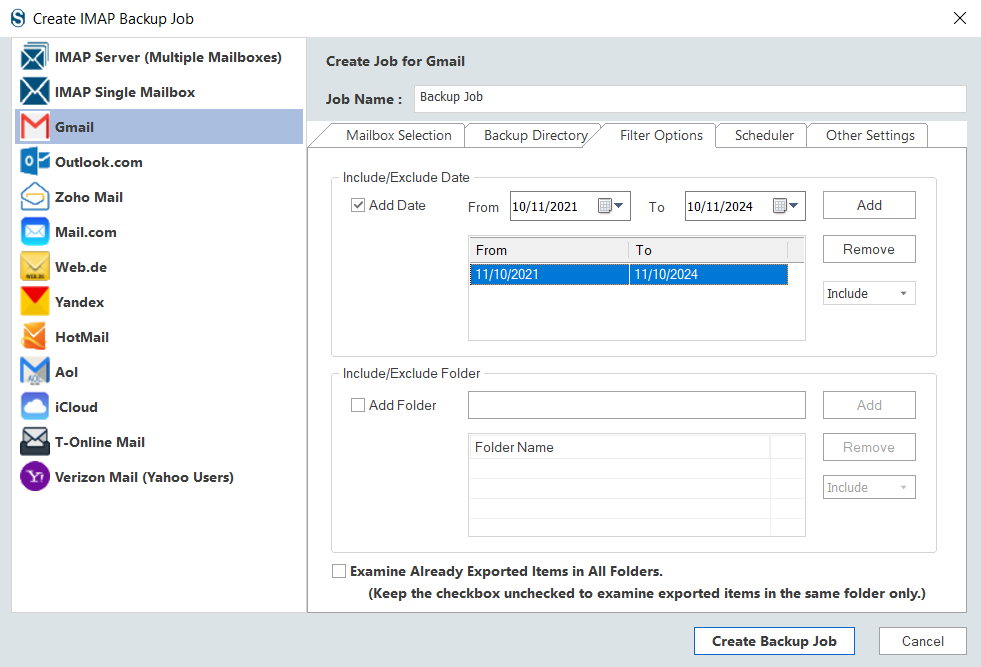
    • Use folder and date-wise criteria to filter items for adding or removing from the process. After that, check the Examine Already Exported Items in All Folders option to prevent duplicate items.
    Filter your backup data
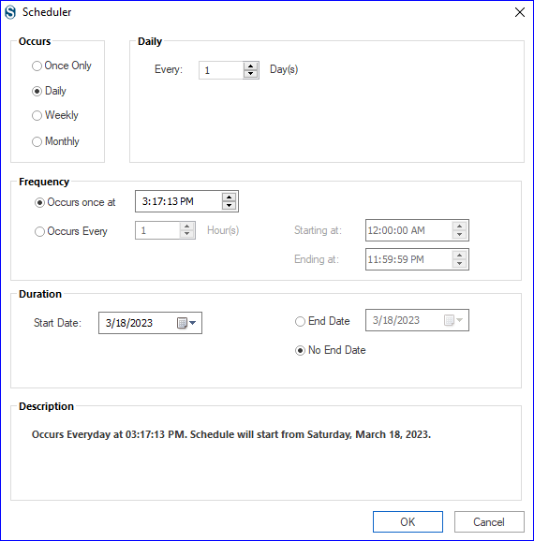
    • Next, kindly move to the Scheduler option and check the Start immediately after creating the job option to run the job once it is done.
    Start backup job immediately of run for later
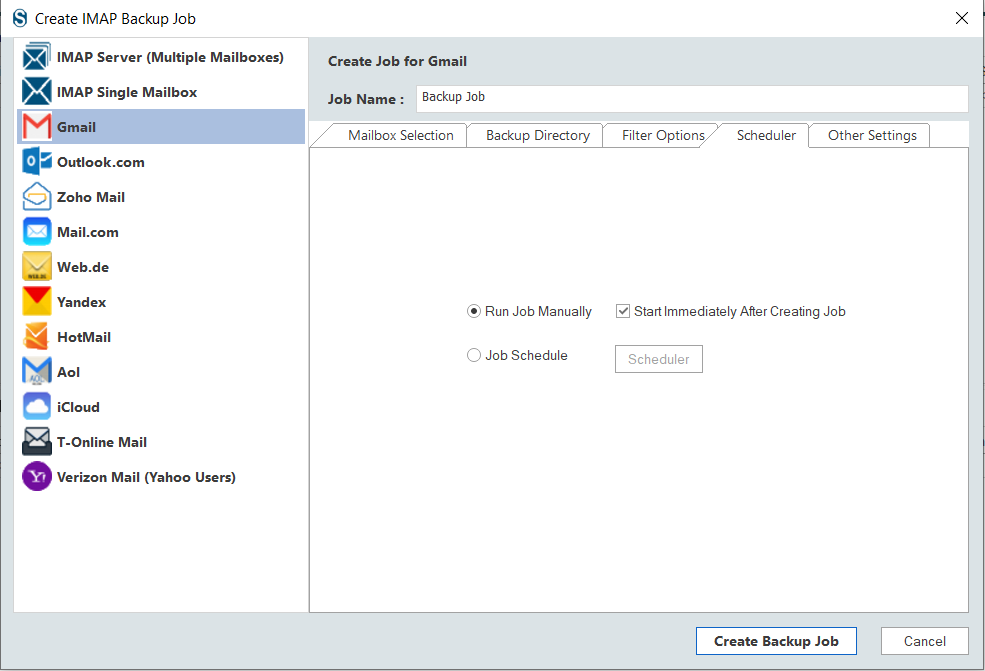
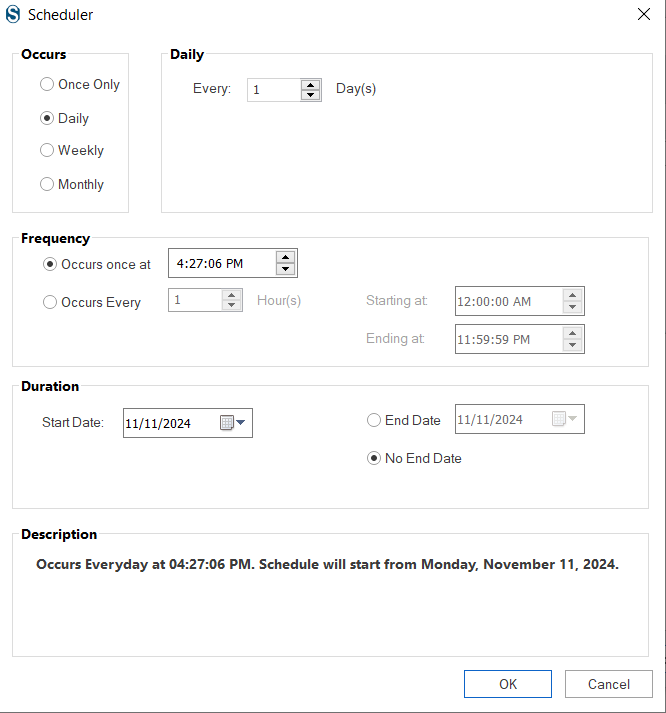
    • You can also choose the Job Schedule option to set backup on a daily, weekly, monthly, or specific date and time.
    Schedule your files backup as you wish
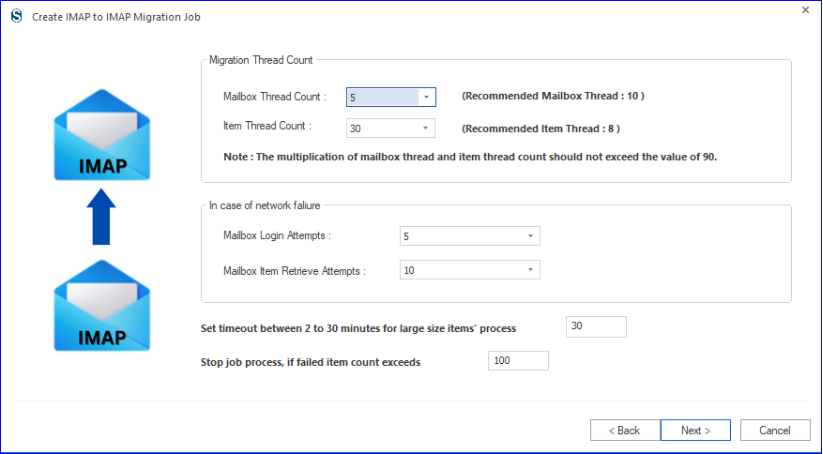
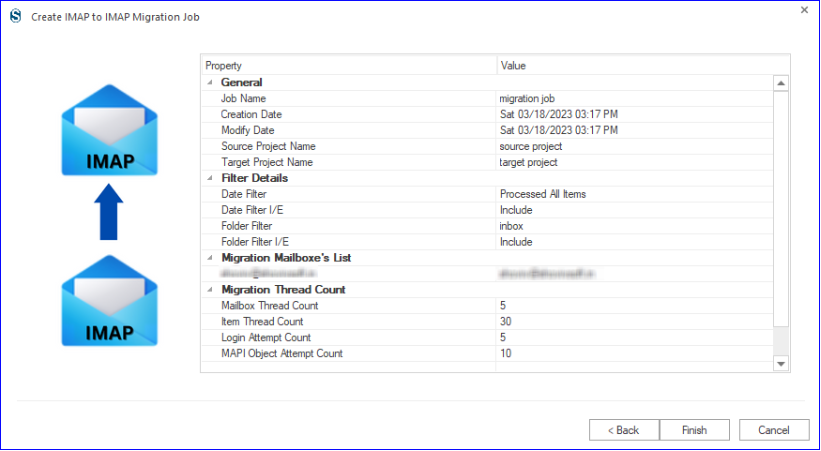
    • Then, modify other settings, like thread item count, max login attempt, etc. and click the Create Backup Job button.
    Thread count
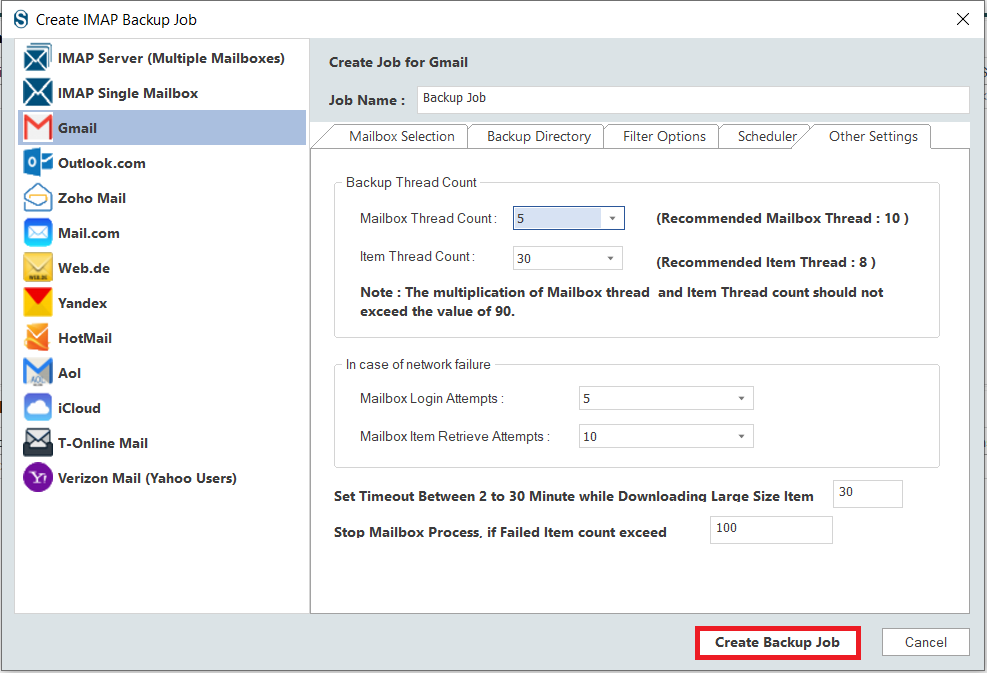
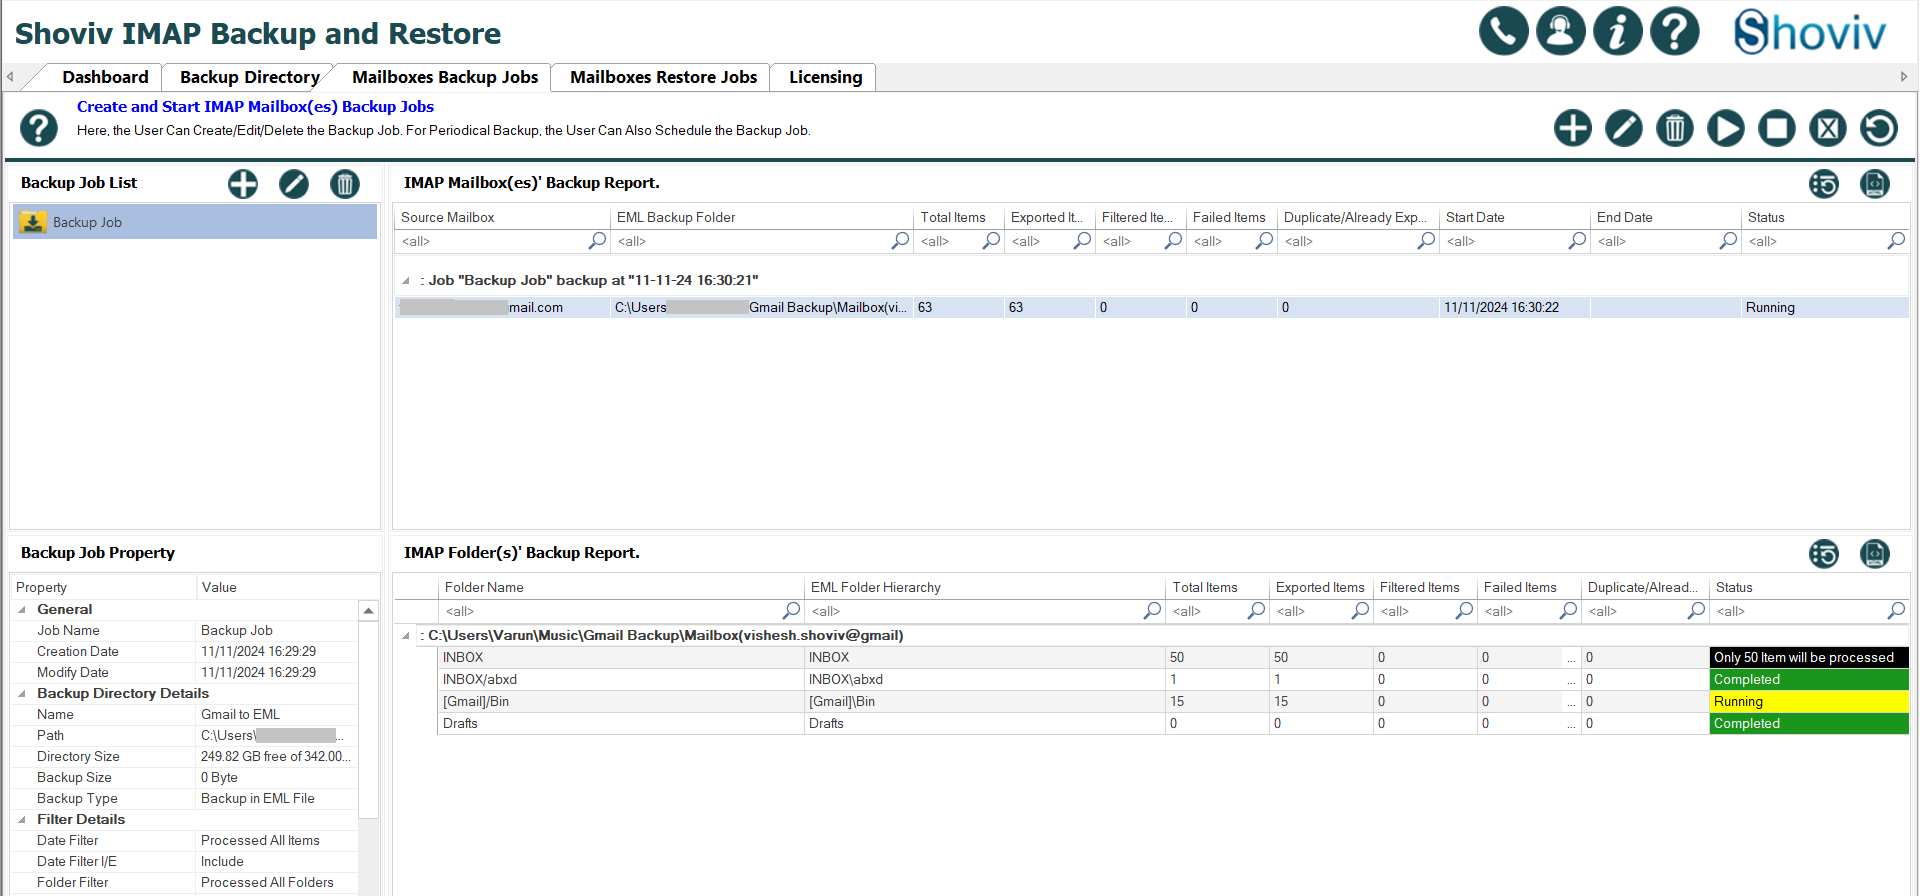
    • The tool will start saving Gmail emails to EML formats.
    Start exporting Gmail emails to EML
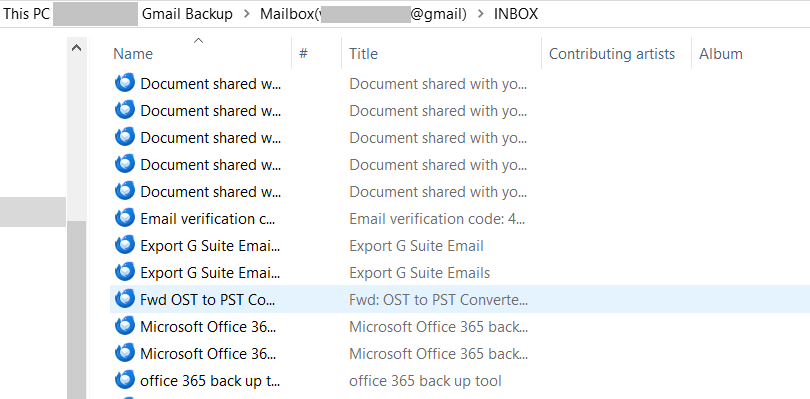
    • Go to the location you selected to save the resultant EML files and check if the data has been exported.
    Locate Saved EML files path

    It’s your turn now!

    This write-up has taught two proven solutions to export Gmail emails to EML file formats. Now, the decision is yours: Which solution do you prefer for downloading or saving their Gmail email in EML format? Professionals always recommend the Shoviv Gmail Backup and Restore Tool for a trusted and reliable approach. Moreover, users can also try its free trial version in their system to understand the stepwise working of the tool.

    The free trial version of this software permits users to process the first 50 items per folder from each folder of the Gmail account. This will make it easier for users to know the tool’s functionality and capability before having hands-on experience with its full version.

    Feel free to ask queries; our support team is available 24/7 to assist users who have any queries related to the software or their tasks.

  • How to migrate email from CenturyLink to Gmail?

    The current time is the time of new and updated technology that simplifies our daily routine tasks, such as email management, collaboration, etc. That is why most users search for information on how to migrate email from CenturyLink to Gmail seamlessly and accurately. The internet is laced with the different solutions available for transferring CenturyLink email to Gmail, but having an effortless approach for moving essential emails from CenturyLink is a must.

    The common reason behind this transfer is the user-friendly interface of Gmail and its advanced features. Moreover, Gmail is better at providing email security and preventing account from the scammed emails. On the other hand, CenturyLink webmail lacks better features, especially for email security.

    Table of Content

    CenturyLink and Gmail email clients: A Short Overview

    CenturyLink (now Lumen Technologies): CenturyLink webmail is an email service that allows users to manage their emails, collaborate and communicate with clients and colleagues. It is basically a telecommunication company. In addition, CenturyLink offers its email service to those who use its broadband or telecommunication services. It provides limited integration with other productivity tools and services.

    Gmail: Gmail is a web-based email client offered by Google. It is equipped with the latest features, like robust search capability, powerful security features, etc. Moreover, Gmail can easily integrate with other tools and services, including Google Docs, Calendar, Drive, and more. It provides free 15 GB storage for each account to save emails, drive data, and Google Photos.

    Why do users transfer CenturyLink email to Gmail?

    Gmail made users switch from CenturyLink webmail to it, as it offers better security features, a quick spam emails filtering option and many more. Let us discuss more of them to know why they transfer emails from CenturyLink to Gmail accounts.

    • The GUI of Gmail is better and more straightforward as compared to CenturyLink webmail.
    • Moreover, Gmail has advanced features that allow it to integrate with other services and productivity tools.
    • Each Gmail account gets 15 GB of free storage to manage their essential data, like emails, photos, files, documents, contacts, etc.
    • Gmail is a free email client, and most importantly, it is a universally recognizable and trusted solution.
    • It offers a powerful scam email filtration and security facility. That includes two-factor authentication, protection from phishing emails, etc.

    Users migrate CenturyLink email to Gmail for a variety of reasons. Above, we shared common reasons for moving emails from CenturyLink to the Gmail account.

    A free solution to forward emails from CenturyLink to Gmail

    This guide will focus on the two best practices that users can use to transfer CenturyLink email to Gmail accounts. We will discuss the free manual method to take CenturyLink webmail data to the Gmail environment.

    Users must use the Gmail web-based email client to forward CenturyLink email to Gmail for free. The steps are as follows for manually running the CenturyLink email to Gmail migration task.

    • Log into Gmail using your account details.
    • From the right corner, choose the Settings icon and click the See all Settings option.
    free forward emails from CenturyLink to Gmail
    • Then, navigate to the Accounts & Import and click the Add a Mail account option.
    free forward emails from CenturyLink to Gmail2
    • After that, type your CenturyLink email address and hit the Next button.
    • Now, choose the Import emails from my other account (POP3) and continue with Next.
    • Enter your CenturyLink username and password. Then, tick the Leave a copy of Retrieved Message on the Server checkbox.
    • In the POP server, fill out pop.centurylink.net and tap the Add Account button.
    • Lastly, pick the No option and go with the Finish button.

    This method can be challenging for new users, as it only exports the INBOX folder from CenturyLink to Gmail accounts. It can take too much time, depending on the size of the emails you are moving from CenturyLink to Gmail. For a quick and effortless migration, users can read the upcoming section, where we will share a reliable and trusted way to move emails from CenturyLink to Gmail environments.

    Which is the best way to run the CenturyLink to Gmail Migration task?

    Shoviv IMAP to IMAP Migration Tool is the seamless way to migrate emails from CenturyLink to Gmail. This software works without limitations and processes items from all CenturyLink folders to the Gmail account. It keeps the folder hierarchy and data integrity of emails when migrating from CenturyLink email to Gmail. Moreover, this tool has a simple user interface, letting new as well as experienced users easily access it and complete this transfer task.

    This software offers a filter option that users can apply to include or exclude desired items from CenturyLink when moving into the Gmail account. It has a default Incremental Export feature to avoid duplicity and resume the process from where it was stuck last. In addition, users will not be restricted from processing large items using this professional CenturyLink to Gmail migration tool.

    Steps to migrate from CenturyLink to Gmail

    • Install and run our IMAP to IMAP Migration Tool.
    • Then, click the Source Connection tab to connect to the CenturyLink webmail.
    CenturyLink to Gmail1
    • After that, tap the Add icon and create a project for the CenturyLink to Gmail migration.
    CenturyLink to Gmail migration
    • Enter a project name, click the Add button to add a mailbox, and type other required details, like server address, mailbox email, password, etc. Then, click the OK button.
    CenturyLink to Gmail migration job3
    • Connect to the target and click the Add button to create the target project.
    • Select the Add button to add a mailbox and enter needed details such as mailbox email, port number, password, etc. After creating the target project, hit Ok.
    CenturyLink to Gmail migration3
    • Go to the Migration Job tab to create a CenturyLink to Gmail migration job.
    CenturyLink to Gmail migration4
    • Then, enter the job name, select the source and the target (that we created in the above steps), select an email address and click the Next button.
    migrate email from CenturyLink to Gmail5
    • Map the source mailbox to the target mailbox, and after mapping, click Next.
    migrate email from CenturyLink to Gmail6
    • Apply filters by the date and folder to avoid undesired items or add only selected items in the process. Tap Next.
    migrate email from CenturyLink to Gmail7
    • After that, set up other options like mailbox thread count, failed items limit, etc., according to your need and click Next.
    migrate email from CenturyLink to Gmail8
    • Schedule the Migration Job if you want; it allows you to perform migration on a regular basis, like daily, weekly, monthly or at any specific day and time. Click Ok.
    migrate email from CenturyLink to Gmail9
    • Review the CenturyLink to Gmail transfer settings and tap the Finish button.
    migrate email from CenturyLink to Gmail10
    • Once done, run the job to migrate email from CenturyLink to Gmail without limitations.

    Bringing It All to a Close!

    This professional write-up has described two solutions to migrate CenturyLink email to Gmail accounts above. The one from the above-shared solutions is a manual method, which can be time-consuming and fail to migrate all folders. On the other hand, the other solution is the Shoviv IMAP to IMAP Migration Tool, a simple way to transfer CenturyLink email to the Gmail environment.

    This software also has a demo version that users can use on their system to learn more about its functionality and working procedure. Its free demo version can process the first 50 items from each folder of the source mailbox to the target.

    Have any queries regarding the task and our IMAP to IMAP Migration tool? Contact our technical support team, which is available 24/7 to assist users worldwide.

Enter To Win
Privacy Overview

This website uses cookies so that we can provide you with the best user experience possible. Cookie information is stored in your browser and performs functions such as recognising you when you return to our website and helping our team to understand which sections of the website you find most interesting and useful.