Category: Gmail

  • Gmail Archive vs. Delete: Which Should You Choose & When?

    Are you searching for a guide to understand the difference between Archive and Delete in Gmail? Here, we will learn briefly about the Gmail archive vs. delete. You will get everything regarding the Gmail archive and Gmail deletes in detail. Gmail users have lots of queries, including: Do archiving emails save space in Gmail? Does archive mean removing emails permanently? Do archived emails get deleted? What is the difference between Gmail Archive and Delete? Which and When to Use? All these questions will be answered in this blog.

    Table of Content

    Let’s briefly explore the Gmail archive and delete

    In this section, we will explore the Gmail archive and delete; also, we will list a few key features of both archive and delete.

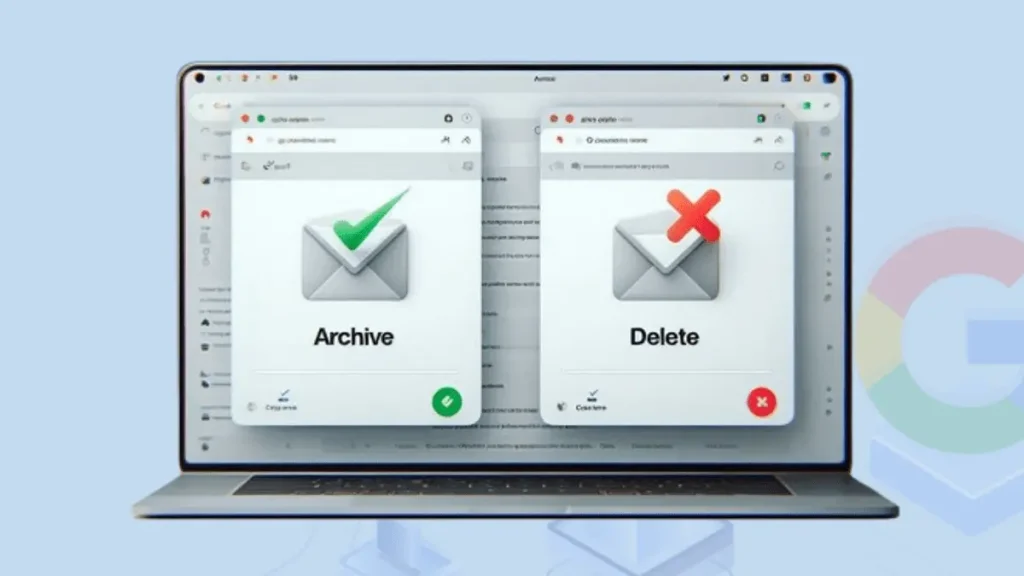
    What is Gmail Archive?

    Archiving emails in Gmail helps users remove the selected emails from their Inbox but not delete them from Gmail. After archiving, the emails will move to All Mail from the Inbox folder. The emails will still be in Gmail but won’t clutter the Inbox once archived. Users can easily keep a record of important emails that they might need in the future by archiving Gmail emails.

    Advantages of Gmail Archive:

    • Users can effectively manage their inboxes even if the essential emails are still in All Mail.
    • Gmail allows users to find their archived emails anytime, as these will not be removed from the account.
    • The archived emails will be kept safe from various unfamiliar situations, including accidental data loss, malware attacks, etc.

    How to Archive the Gmail emails?

    Step 1: Open Gmail on your browser and log in with your account.

    Step 2: Choose the emails you want to archive in the Gmail.

    Step3: After selecting the emails, click the Archive button.

    Archive Gmail Emails

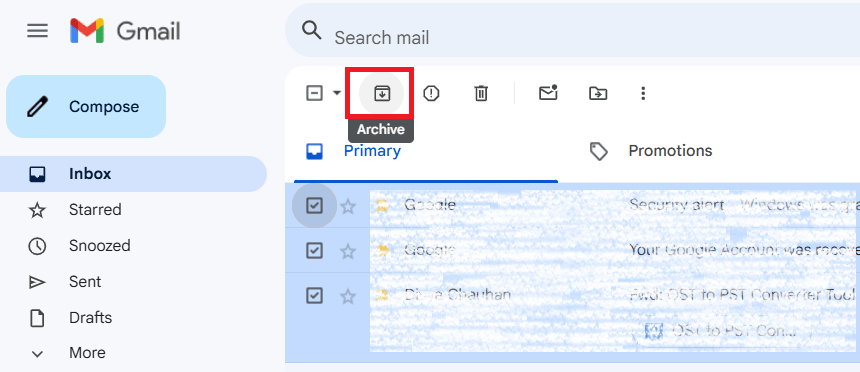
    Step 4: After that, all the selected emails will be archived in All Mail but removed from the Inbox folder.

    What is Gmail Delete?

    Gmail delete means removing an email from a Gmail account. After deleting an email, it will go to the trash folder, and the email will automatically disappear permanently from Gmail after 30 days. During the retention period of 30 days, when emails are in the trash folder, users can easily retrieve their emails in the Inbox folder.

    Advantages of Gmail Delete:

    • Users can efficiently free up storage in their Gmail account if they are running out of space.
    • Emails that users do not need anymore; they can remove emails permanently from their Gmail account.
    • If there are any duplicate emails, you can easily manage them by deleting identical ones.

    How to delete the Gmail emails?

    Step 1: Open your Inbox after logging into the Gmail account.

    Step 2: Pick the emails you want to delete from the Gmail.

    Step3: After selecting emails, click the delete button or trash icon.

    Delete Gmail Emails

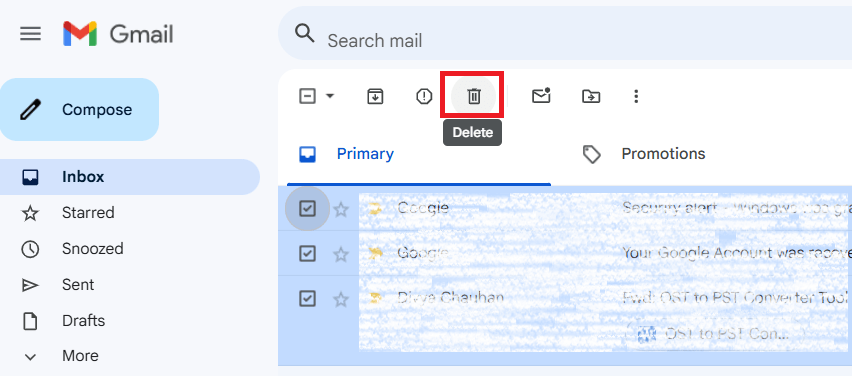
    The emails will be moved to the trash folder after following the above steps.

    Understanding Key Differences: Gmail Archive vs. Delete

    We will use a simple table to know the differences between Gmail archive and delete. This will help you understand quickly what, when and which you should choose.

    FeaturesArchiveDelete
    StorageIt doesn’t reduce Gmail storage.Helps free up storage in Gmail.
    RecoverableUsers can easily find and recover the archived emails.Only recovered within 30 days from Trash folder. After this period, users will lose emails permanently.
    VisibleUsers can find archive emails in Gmail All Mail folder.Move emails to trash that you can find till 30 days after deleting.
    When to UseThat emails you will be needed in the future but want to avoid cluttering in Inbox.Emails that you do not need any more in your Gmail account.

    These are the key differences between the Gmail archive and delete. Now, we will move to know the answer to a few questions related to the Gmail archive and delete.

    Common queries on archiving the Gmail emails:

    1. Does archive mean delete?

    No, archiving doesn’t mean deleting emails from the Gmail account. Archive emails simply help you to avoid clutter in the Inbox by moving them to the All Mail folder; only deleting means permanently removing emails from the Gmail account. Deleting emails will go to the trash folder and can permanently disappear after 30 days from the trash folder.

    2. Does archived emails get deleted?

    No, the archived emails don’t get deleted, except if you intentionally deleted them. They will remain in the All Mail or other folder in which you archived them until you unarchive them. Moreover, archived emails will still be a part of Gmail and take Gmail storage.

    3. Does the archive email save space in your Gmail account?

    No, archive emails don’t help free up space in the Gmail account. After archiving emails, they will go to All Mail from the Inbox folder but will still be in the Gmail account. So, archiving emails won’t light up the load on Gmail storage.

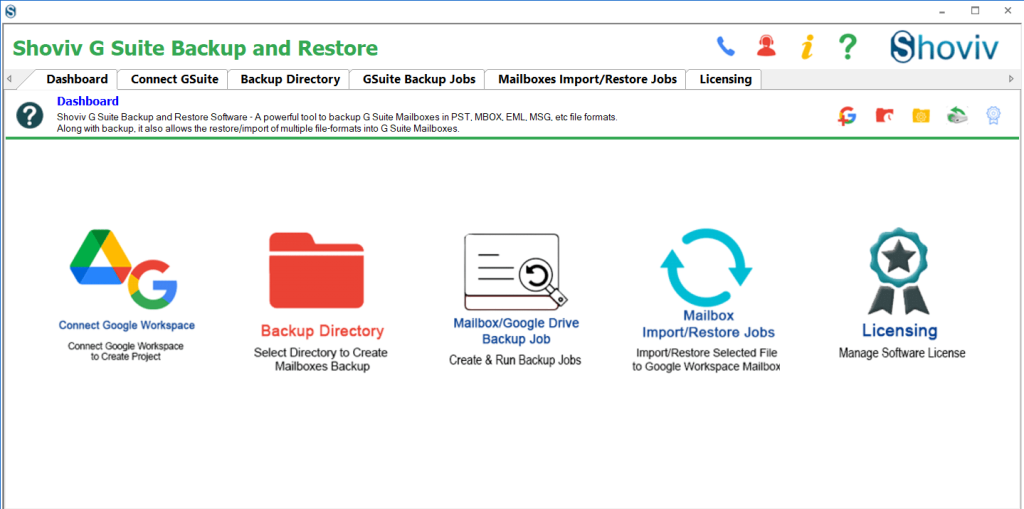
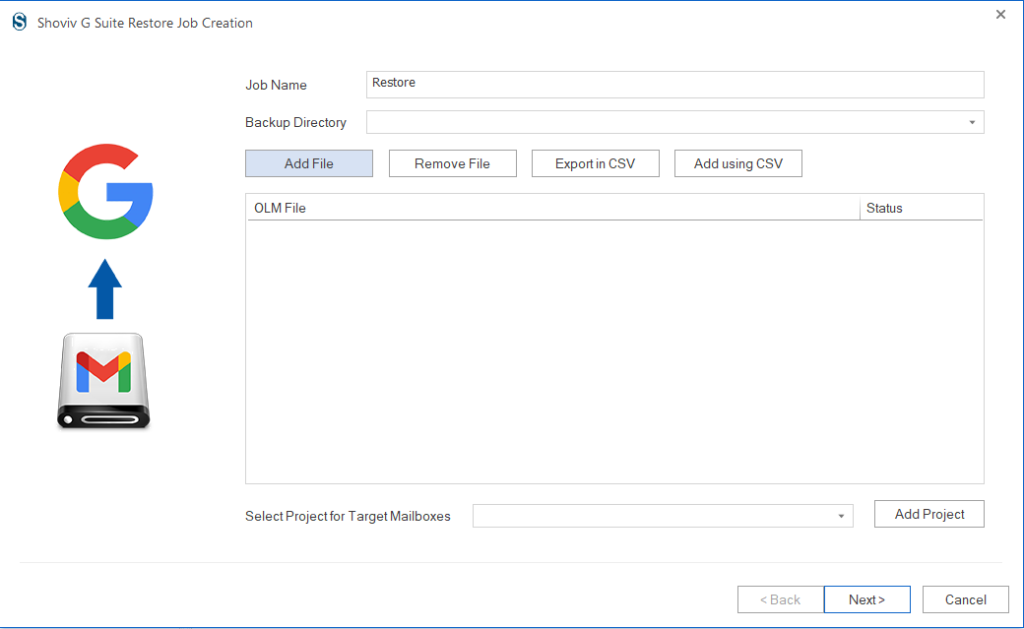
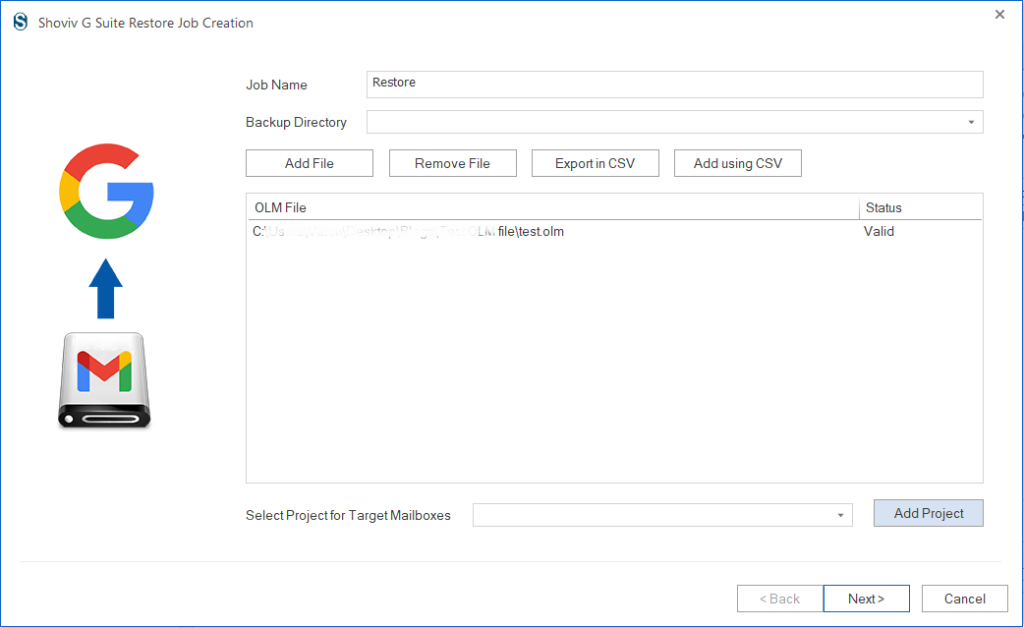
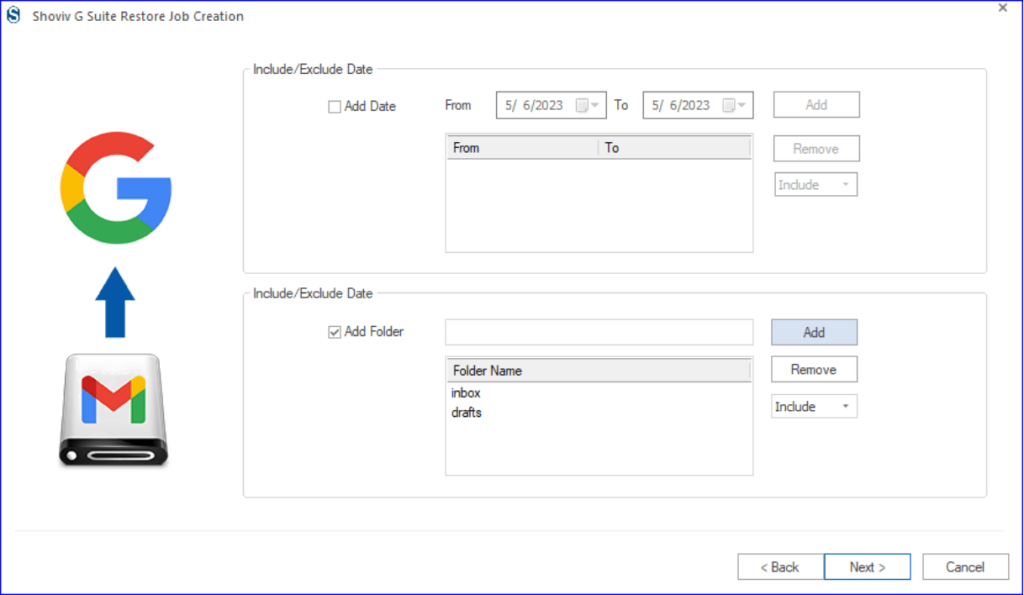
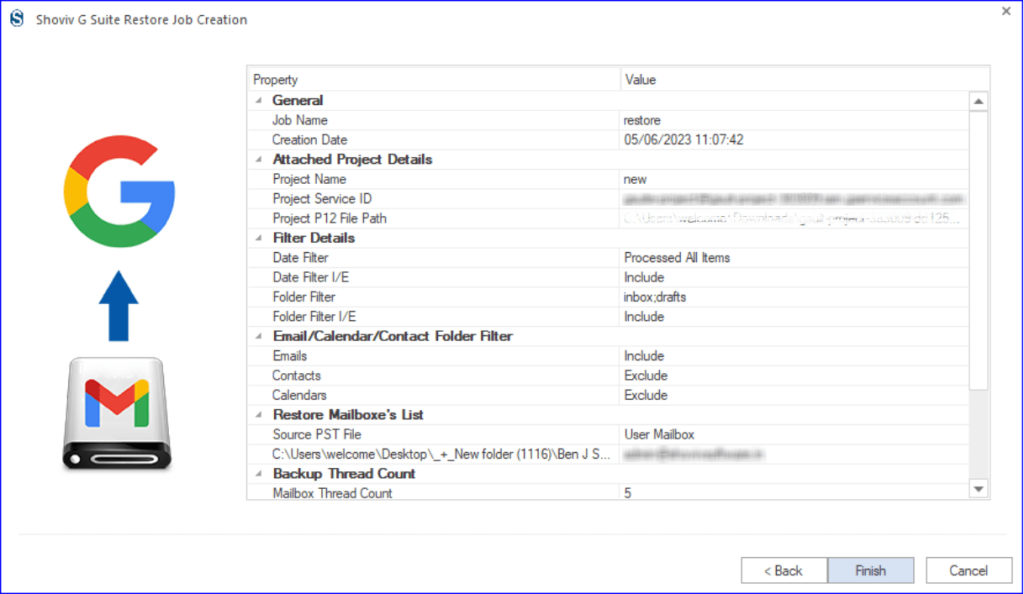
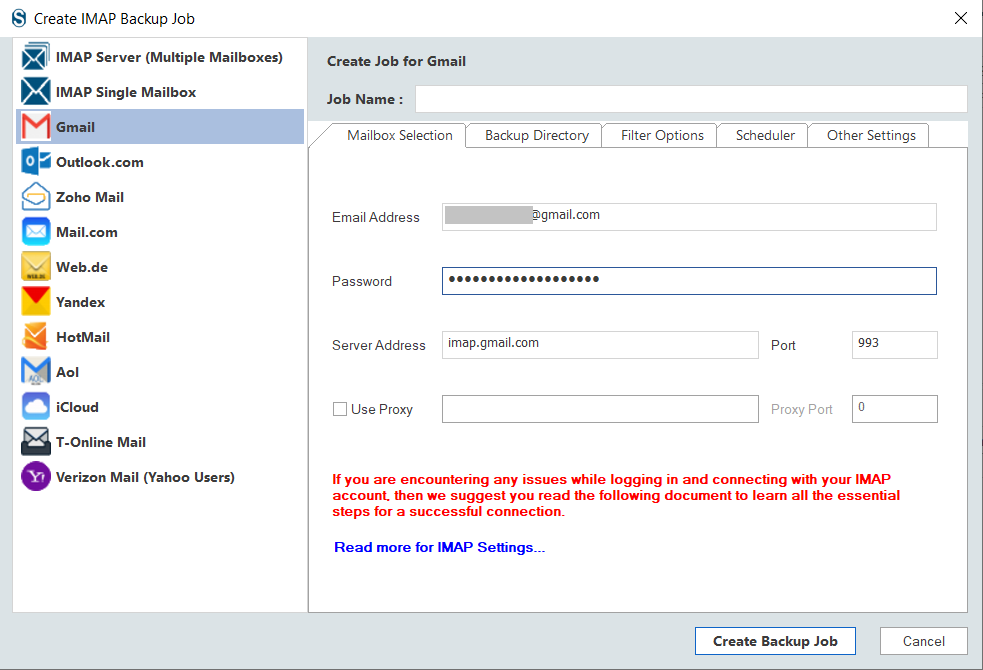
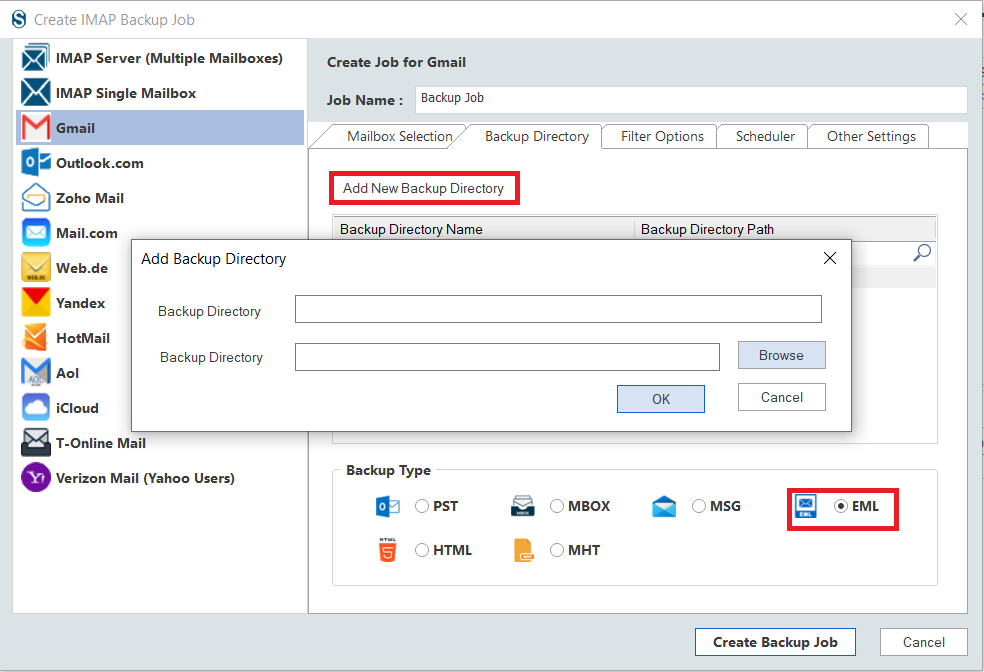
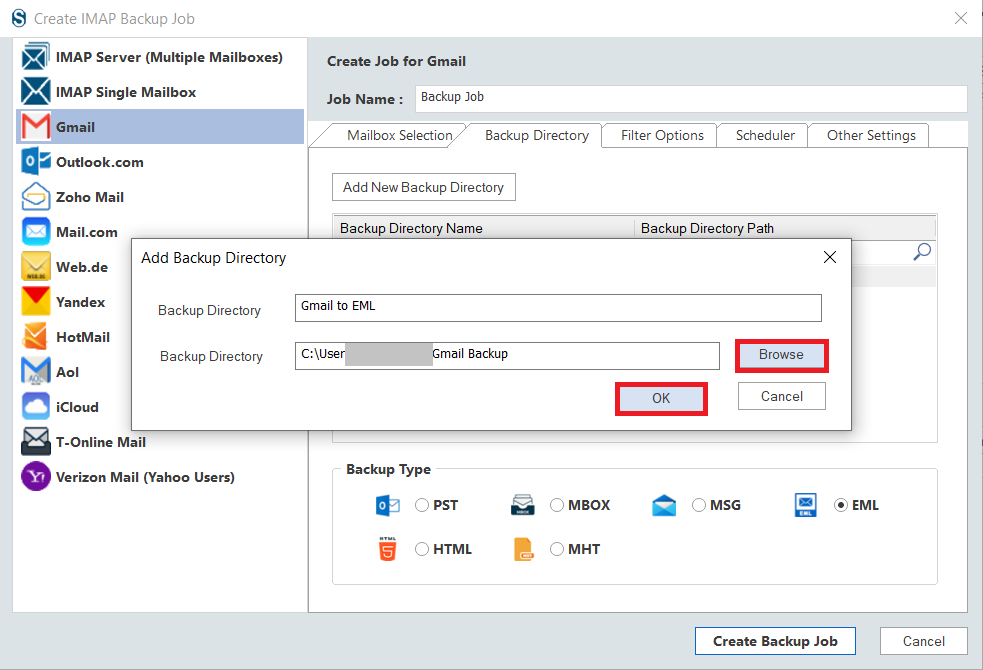
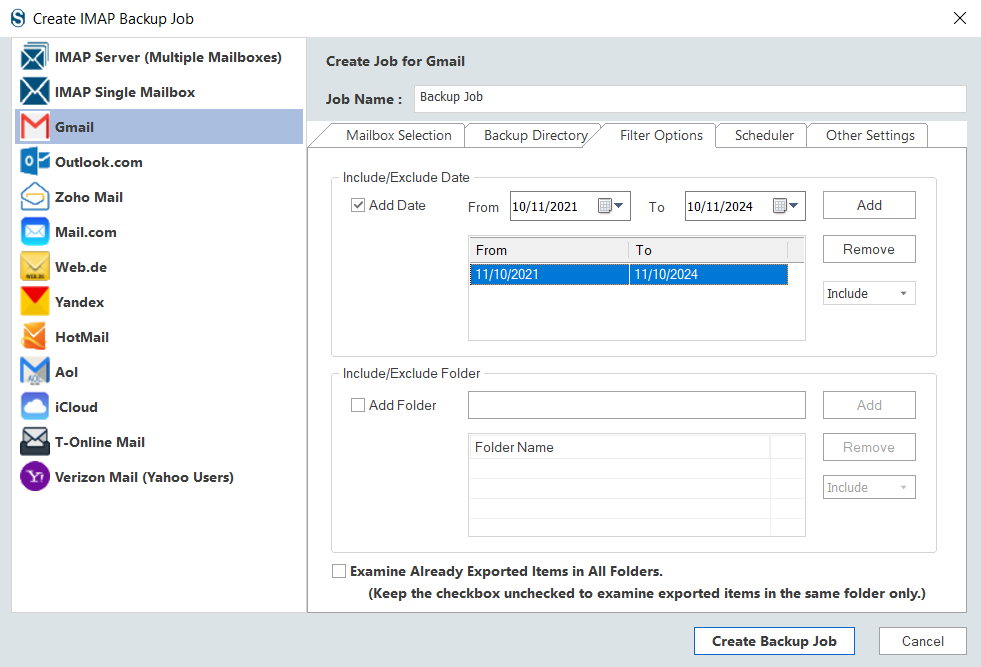
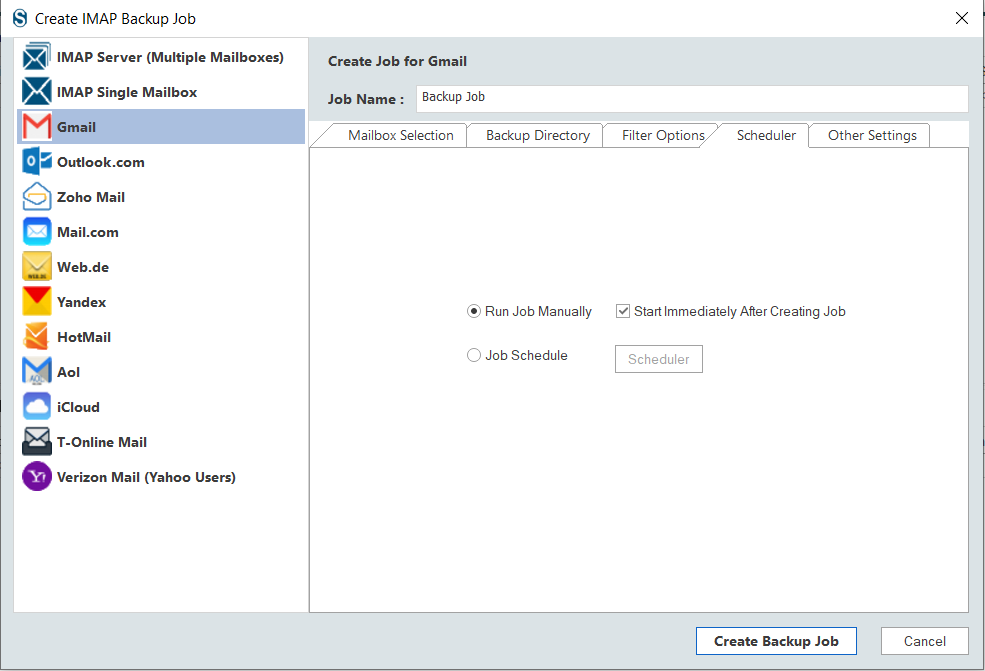
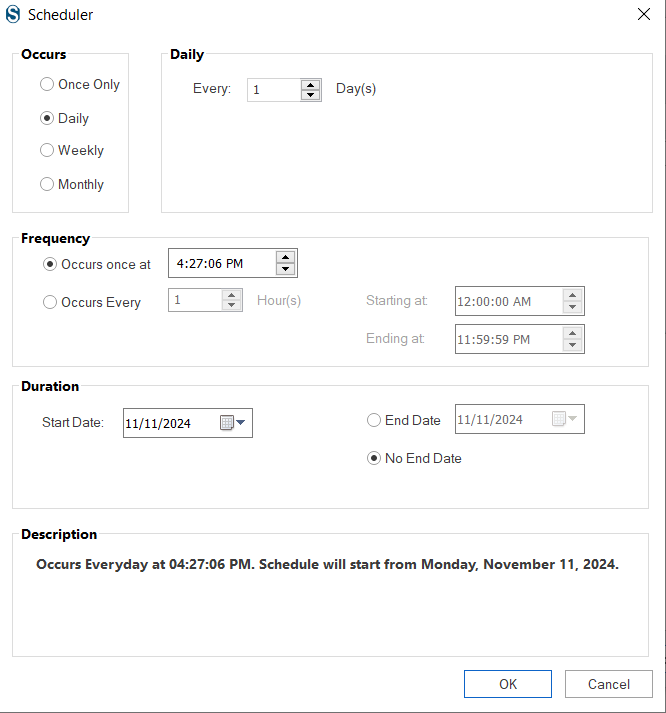
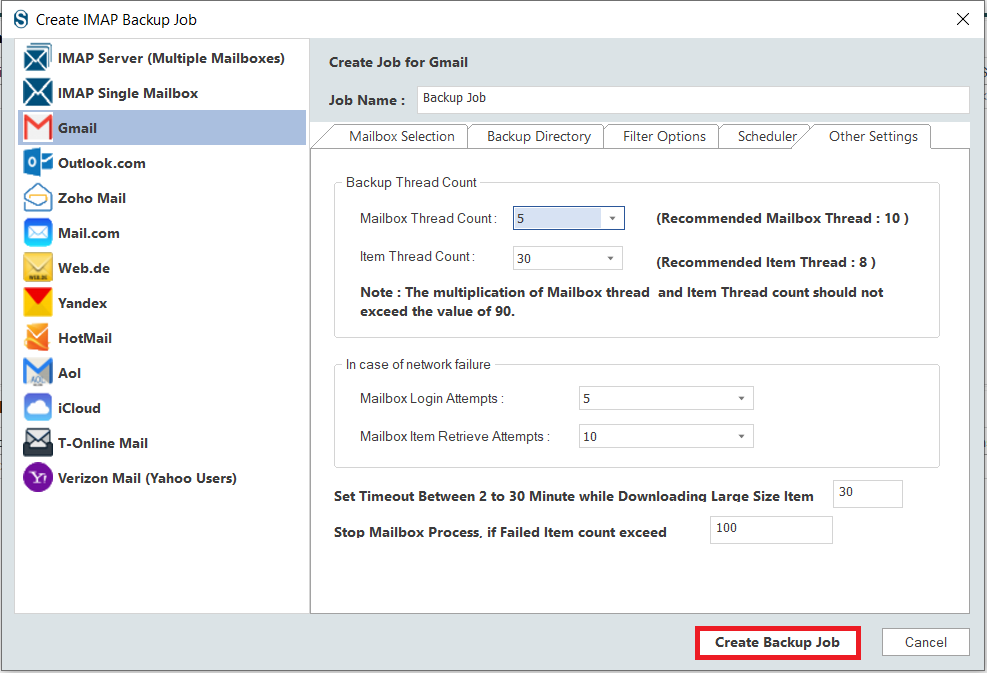
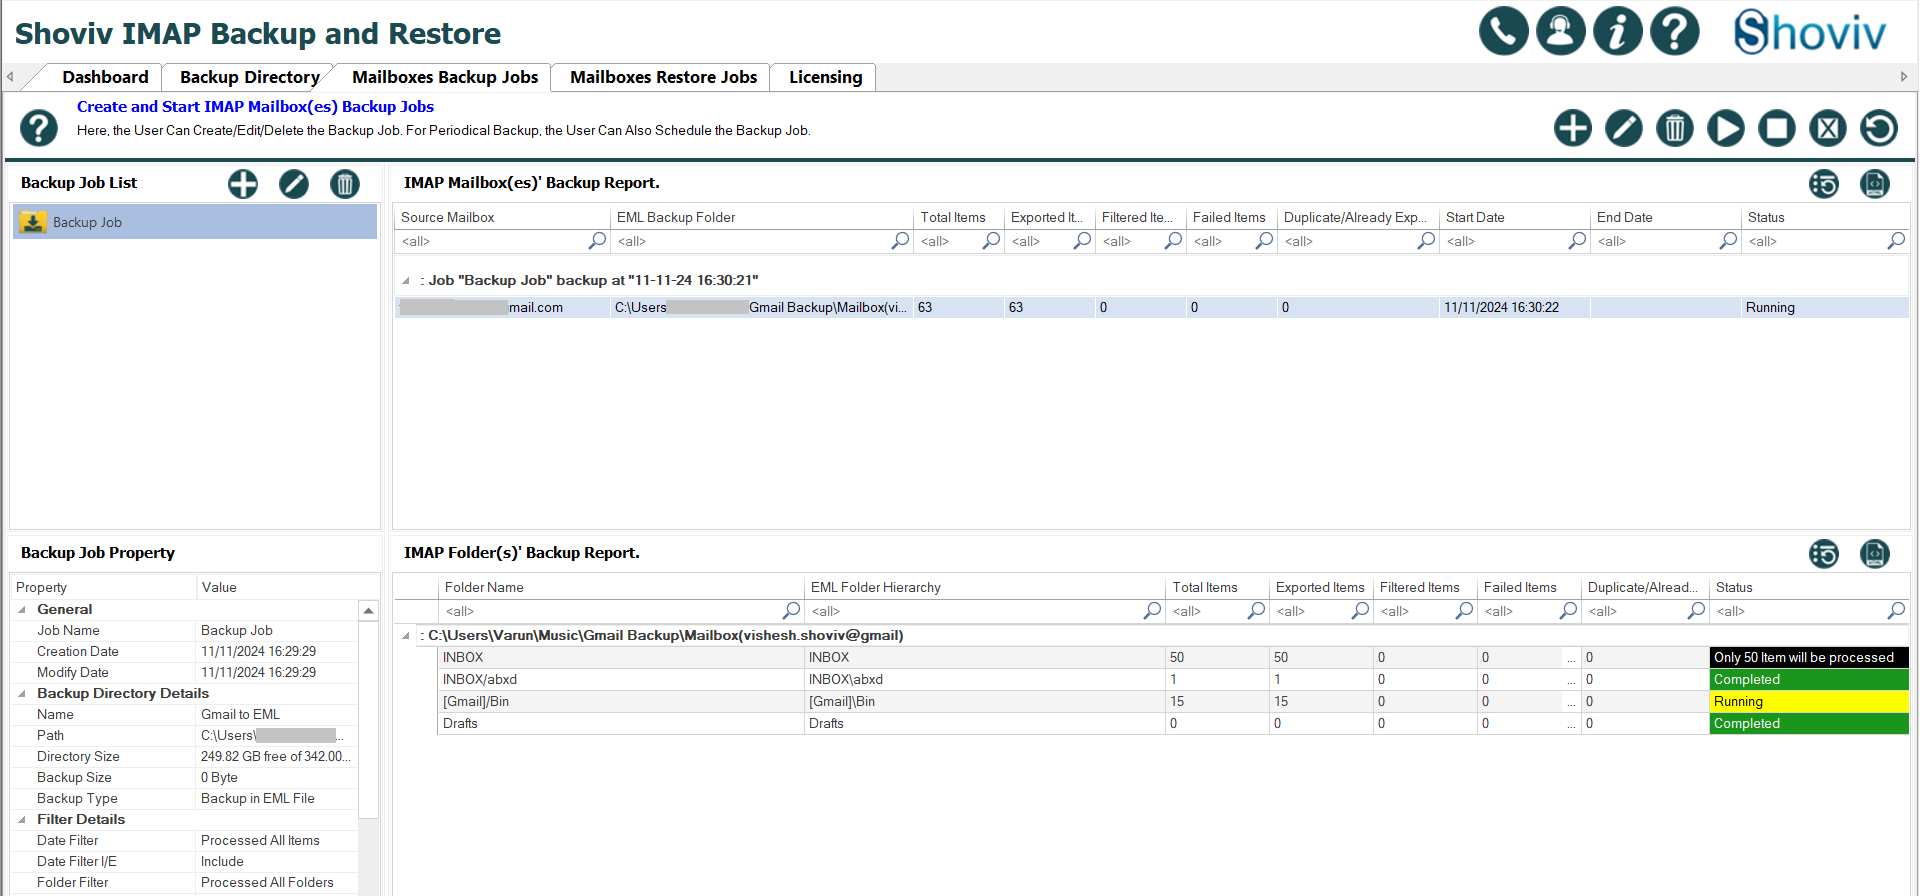
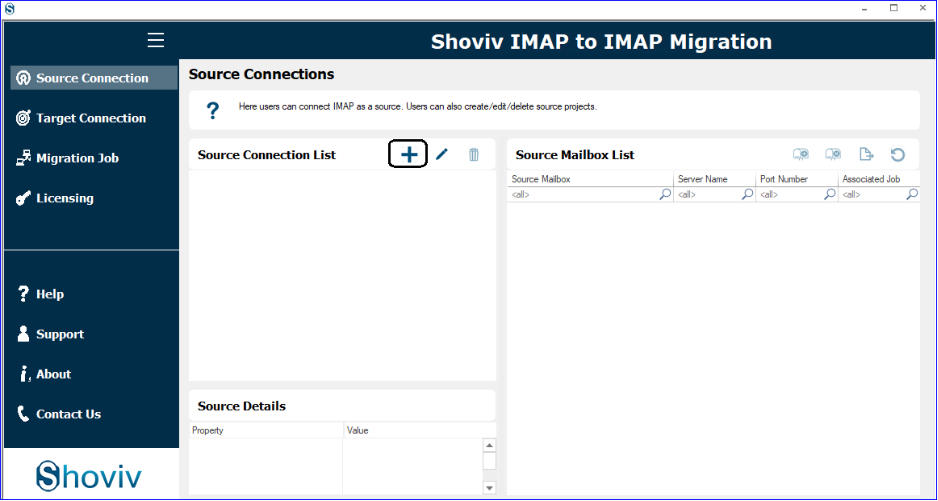
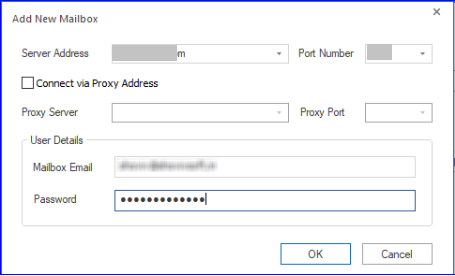
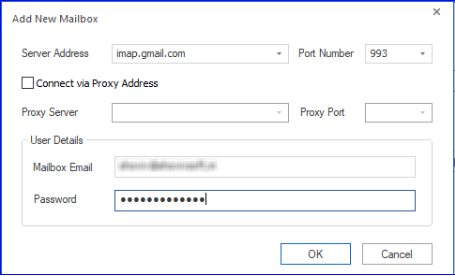
    If you want to save space along with holding the essential emails in the archive, use the Shoviv Gmail Backup and Restore Tool. This software allows users to save archived emails locally into various file formats, like PST, EML, MSG, etc. Using this tool, users can archive emails on their PC locally and free up Gmail storage.

    When Should You Archive and Delete Gmail Emails?

    Archive:

    • To keep a record of the emails you might need in the future but want to prevent your Inbox from cluttering.
    • You want to manage your Inbox emails but not looking to compromise with essential emails.
    • This protects emails from future mishaps, like accidental data deletion, unauthorized access, and many more.

    Delete:

    • Emails that you don’t need any longer in your Inbox and want to free up Gmail storage.
    • Older emails that you do not require in the future for any reference.
    • To manage duplicate items in the Gmail account, you can delete emails.

    Summing Up

    Gmail Archive and Delete are both features of Gmail that fulfil different purposes for the users. This blog shares a detailed view of when you should choose to archive and delete emails from Gmail. Moreover, we also shared key points on Gmail Archive vs. Delete, along with a simple table.

    Try the Shoviv Gmail Backup and Restore Tool to save archive emails locally and free up storage in Gmail. This software is easy to use and shares various file formats to save archived emails into the local drive of your PC. Run its free demo version on your device to explore its functionality and features by processing the first 50 items for free.

  • How to Import OLM File to Gmail (GWS) Business Emails?

    These days, every organization almost relies on emails to communicate, and managing a large number of emails is tricky. Some users use Outlook for Mac, which stores emails into OLM files. Sometimes, users need to switch to Gmail and know how to import OLM to Gmail business emails (GWS). Moreover, this process allows users to access their essential data quickly, especially for big enterprises.

    Gmail is an email client known for its simple user interface and advanced or user-centric features. Users can manage their business emails effectively after switching to Gmail or Google Workspace. So, moving to Google Workspace from other email platforms, like Outlook for Mac, has become a trend.

    However, importing OLM files to G Suite or Gmail business emails is challenging. Therefore, users learn the entire process step-by-step to move OLM files without hassle. This blog will teach you in detail how you can import OLM files to Gmail business emails or G Suite securely and quickly.

    Table of Content

    Why do users adapt Gmail Business over Outlook for Mac?

    There could not be a specific reason for importing OLM to Gmail business emails or G Suite. Users consider this migration for multiple reasons, some of which are as follows.

    • It has a simple GUI, so it’s easy for users to find and manage their emails.
    • G Suite is a cloud-based platform that allows users to access their emails from anywhere with the internet.
    • Moreover, it integrates with other Google Services, such as Google Calendar, Drive, Meet, etc. So, it simplifies the process for users to keep all their data in an organized way.
    • It comes with an impactful security feature and allows users to keep spam emails out of their inboxes.
    • Using Gmail Business, multiple users can work together and edit documents or files in real time.

    Because of these advantages, users switch to Gmail business emails or Google Workspace. If you are searching for a simple way to import OLM to Gmail business emails, your wait will be over in the upcoming section.

    A manual practice to import OLM to Google Workspace

    You can use manual and professional solutions to import Mac OLM files into Gmail business emails. Moreover, you must configure a Gmail business account to Outlook for Mac to import OML data, including emails, calendars, and other data to process manually. We will cover this manual technique in three phases to import OLM to Gmail business or G Suite. Let us begin to understand the process step-by-step.

    Simple steps to import OLM to Gmail business emails

    The first phase of this solution will teach you how to configure your Gmail account on IMAP and move forward to importing OLM to Google Workspace. Then, we will configure the Gmail account to Microsoft Outlook for Mac. Let us understand the detailed steps to use this solution.

    Phase 1: Set up your Gmail Account for IMAP

    • Open Gmail and sign in with your Gmail account and password.
    • Then, press the Settings tab and click the See all settings option.
    Enable IMAP for Gmail to Import OML file
    • Choose the Forwarding POP/IMAP from the Settings page.
    • After that, select the Enable IMAP option in the IMAP access tab and hit the Save changes.
    Cheick Forwarding settings

    Once completed the above steps, you will be done with setting up a Gmail account for IMAP. Now, we will understand the following process for importing OLM to Gmail business emails or G Suite.

    Phase 2: Add your Gmail account in Outlook for Mac

    This process can be particular for each user, depending on their Mac Outlook version. Here, we will share the steps for Mac Outlook, such as Outlook 2011, 2016, and 2019. Kindly follow the steps to import OLM files to Gmail Business or Google Workspace.

    Adding Gmail account in Mac Outlook 2016/ 2019:
    • Launch the Outlook application for Mac.
    • Select Outlook from the ribbon bar and navigate to the Preferences option.
    Import OLM to Gmail in MAC Outlook
    • Then, tap the Accounts option in the Preferences window.
    • After that, press the (+) button and click the New Account option.
    • Enter your Gmail address and click the Continue button.
    Import OLM to Gmail (Enter your Email address)
    • Now, the Google sign-in window will open. Here, enter the Gmail password and hit the Next button.
    • After that, click the Allow button to grant permission.
    Allow Gmail to Read your Email information
    • Your Gmail account will be configured on Outlook for Mac. Tap Done to finish.

    Follow these steps to add a Gmail account on Outlook for Mac if you work on Mac Outlook 2016 or 2019.

    Configuring Gmail account in Outlook for Mac 2011:
    • Open Microsoft Outlook on your Mac.
    • Navigate to the Tools in the menu bar.
    • After that, select the Accounts option from the Tools drop-down.
    Configure your Outlook account with Gmail
    • Click the (+) sign and continue with the Email option.
    Add your Account to Import OLM file
    • Then, type your name, fill in the Gmail address and password. After entering the details, click the Add Account button.
    Enter Server details
    • Thereafter, select IMAP as the account type and enter incoming and outgoing server details if required.
    • Finally, hit the OK button to add your Gmail account to Mac Outlook 2011.

    Phase 3: Import OLM to Google Workspace or Gmail business emails

    • Select the folder that contains OLM files and right-click on it.
    • Then, click the Copy or Move to Folder option.
    • Select the Gmail label name from the new dialogue box and tap the Copy.
    • Choose the Send/Receive option to import OLM files to Gmail Business emails.

    This is the complete procedure of working with the manual solution to add a Gmail account into Outlook for Mac. This solution is free but has some common limitations that can affect the import process.

    Limitations of importing OLM to Gmail manually

    Users will face many limitations when processing OLM files for Google Workspace emails. Before importing OLM files, users must first understand the complexities of the manual solution.

    • This solution can take a long period when users are looking to import multiple OLM files to Gmail business emails.
    • Moreover, this may result in permanently losing OLM file data, like emails and attachments, if users perform a single step abruptly.
    • Users need a good grasp of technical knowledge to import OLM files manually into Google Workspace.
    • This method may affect the original folder hierarchy of the emails when moving OLM to G Suite or Gmail business.

    These limitations might complicate for users to move their OLM files from Mac Outlook to Gmail business.

    Professional OLM to Google Workspace Migration Tool

    Users can find various automated tools online to import OLM to Gmail business emails. However, the Shoviv G Suite Backup and Restore Tool is at the top and recommended by professionals worldwide. This software allows users to process multiple OLM files to their business Gmail account or Google Workspace in a single click.

    When users work with this professional software, no limitations will be applied to add multiple and large OLM files. Users can quickly restore or import OLM files directly to their business Gmail account. Also, the tool permits users to back up G Suite emails in numerous file formats, like PST, EMLMBOXMSG, etc.

    It has an intuitive GUI that streamlines the process for users to move their OLM file data effectively into their Gmail account. The toll also has a filter option to select only specific items to include or exclude from the importing or restoring process.

    Quick Instructions to import OLM to Gmail

    • Open the Shoviv G Suite Backup and Restore Tool once it gets downloaded on your device.
    Create a OLM file restore job
    • Then, click the Mailbox Import/ Restore Jobs tab, select the Import OLM files option, and tap the OK button.
    Select your OLM file
    • Enter the job name and click the Add File button to add the OLM files to the process.
    Name your Restore job
    • After adding the OLM file, continue with the Add Project option.
    Add Target folder
    • Then, provide the project name, email address, and other details. After filling in all the details, hit connect using the P12 File button.
    Create p12 path to restore OLM emails
    • Now, map the source mailbox to the target and click Next.
    MAP OLM with your Google Workspace Account
    • Filter by date or folder to include or exclude items during the OLM files importing task. Thereafter, tap the Next button.
    Filter unwanted Email items
    • Make changes per your preference on the Settings page. Also, check the Run Job Immediately checkbox to process OLM files just after creating the Job and click Next.
    Use thread Count to maximize restore process
    • Tap the Finish button after following these steps to import OLM to Gmail business emails.
    OML file to Gmail Import Process complete

    Ending Words

    Users who want to switch from their Outlook for Mac to Google Workspace cloud platform can implement manual and professional solutions. The manual method has some common limitations, which can become significant if users have multiple and large-sized OLM files. Moreover, users need to technically advance to manually import OLM to Gmail business or Google Workspace.

    Hence, users must use the Shoviv G Suite Backup and Restore tool to import OLM files to Google Workspace or G Suite seamlessly. It offers a simple user interface; any user can process OLM importing or restoring tasks. This tool also comes with a free test version, which users can use to process 50 items from each folder of the OLM files to Gmail business emails or G Suite.

  • What is the Difference Between Personal and Business Gmail?

    Are you also a Gmail user or planning to switch your email platform to Gmail but want to know more about its email services? If yes is your answer, then read this informative blog until the end.

    Gmail, a popular web-based email service by Google, allows users to send and receive messages and files across various platforms like Windows and Android, with standout features like massive data storage capacity in the gigabytes for writing, sending, receiving, and managing your messages easily.

    Table of Content

    Some Advanced Features Offered by Gmail Platform:

    • It offers tools such as advanced filtering, seamless syncing, robust spam protection, email reminders, integrated virus protection, scheduling features, and recurring email functionality.
    • Users can program their emails to dispatch at any chosen moment.
    • With Gmail, you get sync support every hour, all day long.
    • Gmail lets you personalize your inbox with various themes and colour choices.
    • Gmail offers a range of third-party extensions that enhance its functionality, from scheduling messages to tracking their delivery.
    • It provides a free online email service that allows users to manage messages using IMAP and POP connections via its website or external apps.
    • Gmail outshines its robust spam filters, virus protection, and other advanced security features.
    • When you sign up for Gmail, you get a distinctive Google account with an email ID that always ends in @gmail.com.

    Does Google provide different versions of its widely used Gmail service?

    Google Mail, simply known as Gmail, is one of Google’s standout products. It provides a versatile email service suitable for both personal and business needs. Known for its strong capabilities, it’s a popular free email client that provides functions that competitors usually charge for.

    An Overview of Personal and Business Gmail

    Personal Gmail – For daily emails, many rely on the free convenience of a personal Gmail account. It effectively integrates with other Google products, like in-email chat and Google Drive, providing a streamlined user experience. With options like email scheduling and various qualities of life enhancements, it stands out as a top pick for personal use, offering a sense of ease and comfort.

    Business Gmail – Alternatively, Gmail for business is built for companies and professionals, offering advanced features and customizations to support business operations. Tailored for teamwork, it delivers the customization, integration, security, and storage needed for effective business collaboration, empowering users with professional tools and features.

    To grasp the difference between personal and business Gmail, we must explore what each one does. Let’s uncover the intriguing distinction between personal Gmail and Gmail for business, also known as Google Workspace. This article will provide a comprehensive comparison, informing you about the significant contrast between these two versions.

    What is the difference between Personal and Business Gmail?

    Personal GmailBusiness Gmail
    Free account for individual use.Paid account designed for the business and organizations.
    Uses the format yourname@gmail.com.Uses custom domains, such as support@yourcompany.com
    Includes basic Gmail features such as email, Google Drive, Google Meet, and Google Calendar.Includes additional business tools like Google Meet with higher participant limits, Google Chat, shared calendars, advanced security and compliance features, and business-grade support.
    Emails are sent from @gmail.com domain, with no customization.Allows for a customized email domain, branding, and company logos.
    Standard security features like two-factor authentication (2FA) and spam protection.Advanced security features, such as endpoint management, data loss prevention (DLP), and advanced phishing protection.
    Offer 15GB of shared storage across Gmail, Google Photos, and Google Drive.Offers higher storage options depending on plan, starting at 30GB per user and going up to unlimited storage for higher-tier plans.
    Limited to help forums and self-service support.24/7 support via phone, email, and chat, with different response times based on the subscription plan.
    Intuitive admin console is missing.Centralized admin console for user management, setting permissions, and monitoring activities.

    Why do I need to choose Business Gmail over Personal?

    Google Workspace provides all the essential productivity tools an office could need. Still confused? Let’s discover the benefits of choosing Business Gmail over Personal Gmail in detail and find out which one suits your needs best.

    • Account Design & Purpose—Gmail’s free version is designed for personal use. At the same time, the premium option is crafted for business efficiency. It provides tailored email domains, personalized branding, and custom company logos. With business Gmail, employers can manage accounts completely. In contrast, personal Gmail accounts are off-limits and solely owned by the individual user.
    • Email Address— In personal Gmail, users can use the format theirname@gmail.com. Gmail for business lets you create communal email addresses, such as support@company.com, for your team’s needs. You must add each email address to share a file with five others in personal Gmail. Alternatively, you can quickly update access for users or groups in your business Gmail by selecting the drop-down menu and making changes with one click.
    • Team Management & Collaboration— Personal Gmail lacks the features needed for effective teamwork and restricts file sharing to single recipients. With Google Workspace, you can create a professional email address using your own domain. Google Meet typically caps particular numbers, but you can easily host meetings with 100+ attendees with Google Workspace for business.
    • Access & Admin Control— A business email lets you assign an admin to oversee and manage all user accounts effortlessly. You can manage user access to business Gmail by adding or removing members through the admin console. Unlike personal Gmail, business Gmail offers an admin console for unified management, empowering owners to regulate company data and access permissions.

    Backup Google Workspace (Gmail for Business)

    Effortlessly Backup Your Business Emails from Google Workspace Account with Shoviv G Suite Backup and Restore Tool.

    Get More Information

    • Brand Consistency – Using a personal email to follow up on your business website can confuse potential customers and lower your chances of closing a deal. For better brand consistency and higher conversions, always use your business email.
    • Storage Capacity – While personal Gmail comes at no cost, business users can choose a subscription for enhanced features. With Gmail for business, workspace users can effortlessly create, modify, and manage files. Google Drive supports many file types, from documents to PDFs, with storage options varying from 30GB to 5TB, depending on your subscription plan. It offers a substantial advantage for business needs compared to the standard 15GB personal plan.
    • Enhanced Security Features— When users upgrade to business Gmail, they get expanded storage, robust security, and premium tools that go beyond what the free plan provides. For enhanced security, Gmail for Business offers advanced encryption and two-factor authentication.
    • Customer Support- Business Gmail offers superior customer service and support beyond what personal Gmail provides. Business Gmail admins can connect with Google support anytime, day or night, for technical help via phone or chat. Those who sign up through an authorized reseller gain extra benefits, including local language support and a dedicated customer portal. Elevate to business Gmail and enjoy 24/7 customer support as part of Google’s comprehensive assistance package.

    How to create a Gmail account for business purposes?

    Setting up Gmail for business is easier when your domain is ready beforehand. Whether it’s a domain you already have or one you intend to purchase from Google, you’ll need it to create your account. Let’s create a customized business Gmail using Google Workspace. Below, we have mentioned a few simple steps. Just follow them:

    • Visit workspace.google.com and select ‘Get started’ to begin.
    Gmail vs Google Workspace
    • Share your business details, including business name, team members, and country.
    business gmail vs personal gmail
    • Let us know if you own a domain name like yourbusiness.com.
    • Connect your existing domain, or search for a new one to purchase if you don’t have one yet.
     gmail personal vs business
    • Provide your contact info, including location.
    gmail personal vs business account
    • Pick your login name or user ID and password.
    • Choose a plan and finish your checkout process.

    After setting up your business email with Google Workspace, personalize your signature and integrations like DocuSign or Calendly to boost your business efficiency.

    Who should opt for Personal Gmail and Business Gmail?

    While there is no doubt both personal and business Gmail accounts are cloud-based email solutions, the question is, which one should you opt for? Choosing between personal and business Gmail hinges on your individual needs and preferences. Here’s top-3 breakdown:

    1. Gmail for Personal Use

    • Personal Gmail is perfect for a simple, easy-to-use, and cost-free email solution.
    • It offers vital functionalities, browser extensions, and 15Gb free cloud storage.
    • For freelancers starting, Gmail is ideal; it’s free, reliable, and covers all your basic brand needs without the extra cost of advanced features.

    2. Gmail for Small Business Use

    • The Business Starter plan in Google Workspace is ideal for small teams of up to 10 members.
    • Benefit from advanced support simplified IT management, and an affordable monthly fee of only $6 per user.
    • The business standard plan boosts support, expands storage, and elevates Google app performance, making it perfect for growing businesses.

    3. Gmail for Large Business Use

    • Google Workspace’s Enterprise plan is a game-changer for large-scale businesses.
    • This option provides bespoke solutions, a committed account manager, robust security, and various extras.
    • If your organization needs comprehensive solutions and enhanced support, consider the Enterprise plan.
  • What should you do if Gmail Forwarding is not working?

    Are you dealing with the ‘Gmail Forwarding Not working’ issue? If yes, then don’t worry; it is common that Gmail users, particularly professionals, need help to forward emails to other addresses. Pause your search and dive into this guide to discover the top tricks for fixing Gmail forwarding not working issue

    Gmail is a popular email service that offers a powerful platform for quickly composing, sending, receiving, and managing your messages. Users can simply log in to Gmail on their mobile app or browser and manage all their emails directly from the cloud.

    Table of Content

    Features Offered by Gmail Platform:

    • As one of the top email clients, Gmail by Google lets you effortlessly write, send, receive, and delete emails.
    • Google’s Gmail is a widely used email platform that works across multiple systems like Windows and Android. It is known for storing vast amounts of data and enabling seamless digital communication.
    • With superior spam filtering, virus defense, and more, Gmail offers more security than others.
    • Gmail is a top email client with features including email filtering, sync capabilities, spam protection, reminders, built-in virus safeguards, scheduling, and recurring email options. These features provide a reliable and secure platform for your email needs. With a range of powerful features, it’s among the top free email clients, offering services that often come at a price with others.
    • Gmail offers a free, web-based platform for sending and receiving emails, accessible through its site or third-party apps via IMAP and POP protocols.

    Gmail’s email forwarding feature is a convenient tool that streamlines the task of automatically sending emails from your account to other addresses, providing a sense of relief in managing multiple accounts and setting up temporary Gmail forwarding emails to another domain address.

    Why is Gmail forwarding not working?

    Gmail’s email forwarding lets you effortlessly send messages from your inbox to other addresses, streamlining your email management. It helps you handle various accounts and set up temporary Gmail forwarding emails to another domain address. However, problems with message forwarding in Gmail can be a significant inconvenience during email transfer. Below are several possible causes why Gmail isn’t forwarding emails correctly; let’s explore them.

    Some Common Reasons Behind the Gmail Forwarding Not Working Issue:

    • Wrong email address
    • Internet connectivity issue
    • Improper configuration of Gmail
    • Disabled Gmail IMAP/POP setting
    • Rules in email
    • Sudden outage issues
    • Conflict with IMAP/POP setting
    • Windows firewall
    • A corrupt PST file
    • Lack of expertise or knowledge
    • Saving all emails in the spam folder instead of the main inbox folder for any reason.

    Now that you know why Gmail isn’t forwarding emails, let’s investigate how to fix it.

    How to Fix ‘Gmail Forwarding Not Working’ issues?

    Discover authentic and effective methods to troubleshoot the ‘Gmail Forwarding Not Working’ issue with manual and professional help.

    Manual Workarounds to Fix Gmail Not Forwarding Emails

    There are a few top manual techniques to address the issue of Gmail forwarding needing to be fixed. Check out these top methods to resolve the email forwarding issue and see if they help.

    Method 1: Check Stable Internet Connection

    An unstable internet connection makes it challenging to send emails seamlessly through Gmail or any email service. Ensure you have a solid network connection to prevent problems with your Gmail not forwarding emails.

    Method 2: Verify Gmail Forwarding Setting

    Using an incorrect email address for forwarding can lead to a chaotic inbox, making it hard to handle all your emails efficiently from one account. To fix minor issues, re-check the forwarding setting and enter the correct email address. Follow these quick steps to clear up temporary glitches.

    • Go to your Gmail and open it.
    • Navigate to the ‘Setting’ area.
    • Tap on the ‘View all Settings’ option.
    • Go to the ‘Forwarding and IMAP/POP’ section.
    • Then, enter a valid ‘Email Address’ for forwarding.
    • Last, hit the ‘Save Changes’ button.

    Method 3: Check All Email Filter Rules

    If the forwarding settings look good, but the problem continues, check the filters and rules to fix the Gmail auto-forwarding issue. Sometimes, the filter settings can clash with the forwarding option. Follow these steps to access your Gmail filters.

    • Launch your Gmail account.
    • Navigate to the Settings.
    • Click on ‘View all Settings.’
    • Go to the ‘Filter and Blocked Addresses’ section.
    • Then, confirm that no ‘Delete It‘ filters are active.

    Method 4: Check Gmail IMAP/POP Enable Settings

    If your Gmail forwarding isn’t working, check that IMAP or POP settings are turned on for incoming emails. To fix the issue, follow the below steps.

    • Access Gmail via your browser and log in to your email account.
    • Go to the main menu and choose Manage label option.
    • Then, navigate to Forwarding and IMAP/POP.
    • Select ‘Enable IMAP‘ or ‘Enable POP,’ and click on Save Changes to apply.

    Method 5: Delete Outlook Email Rule

    Specific Outlook rules might block Gmail messages from being forwarded to your Outlook account. Remove the Outlook rule to get Gmail emails forwarding again. Follow these simple steps:

    • Open your Outlook app.
    • Tap on the File tab.
    • Choose the Manage Rules & Alerts option.
    • Here, you’ll see the Rules and Alerts window appear.
    • Pick the created rules.
    • Next, hit Delete and select OK to clear all created regulations.

    Method 6: Sudden Gmail Outage

    A sudden Gmail Outage issue frustrates users; it can stop forwarding Gmail emails without warning. These annoying errors often pop up due to server downtime or short-lived glitches. So just be patient while server outage issues aren’t fixed. Also, check the server before starting the email forwarding process.

    Method 7: Ensure the Forwarding Email Account Not Full

    If the Gmail account designated for forwarding is low on storage, the email forwarding feature may need to be fixed. It’s best to check that the account is still within its storage limit. With this option, forwarding new emails to multiple Gmail addresses is a breeze for users.

    Method 8: Temporary Turn Email Forwarding & IMAP/POP Configurations

    Sometimes, IMAP/POP settings can create conflicts with email forwarding settings. The problem might stem from how Gmail email forwarding is set up. To fix Gmail email forwarding issues that are not working, turn off the IMAP/POP settings temporarily. Also, disable or re-enable the Gmail email forwarding option. This quick troubleshooting tip can fully resolve the issue with ease.

    Method 9: Clear the Browser’s Corrupted Cache Data

    Browser issues can sometimes disrupt Gmail’s email forwarding configurations. Common browser glitches may be due to broken cookies, outdated updates, or troublesome extensions. Remember to clear your cache and cookies history to enable seamless Gmail forwarding. It’s helpful to get rid of those browser issues. If the problem persists, consider using a different web browser.

    Method 10: Having a Sufficient Knowledge or Expertise

    Mistakes happen when users need to configure Gmail forwarding correctly. Insufficient skills and understanding could cause it. More know-how and proficiency might lead to data loss. Therefore, you are advised to reconfigure the settings and turn on Gmail email forwarding. Also, you need to have a better understanding of technical expertise.

    Method 11:  Restart Your Devices

    Sometimes, your device gets overheated due to prolonged usage and active background applications. It might affect the performance of the Gmail app. So, restart your device, and the problem will disappear.

    Method 12: Update Your Gmail Application

    To keep issues at bay, update your Gmail app right away. Here is the solution for you:

    • Android users, just head to the Google Play Store app.
    • Visit the App Store on your iOS device to find out if there’s a new update for the Gmail app.

    Restrictions of Manual Techniques:

    • Handling large amounts of data makes it a time-consuming and tiresome task.
    • Manual fixes for Gmail forwarding are generally effective only for minor problems.
    • Security isn’t assured, and data could be lost.
    • Required enough technical expertise.

    Whenever you don’t resolve the issues of ‘Gmail Email Forwarding is Not Working,’ even using these manual techniques. Then, opt for professional solutions. Here, you can grasp the issue and get expert support.

  • How to Export Gmail Emails to EML Format?- A Stepwise Guide

    Gmail is a prominent email client worldwide in small and large organizations. For some reason, most users want to export Gmail emails to EML format. Therefore, users should focus on this professional write-up to understand different approaches to saving or downloading Gmail emails to EML files.

    Whether you want to take your Gmail emails to EML for migration purposes or for any other legal reasons, applying an easy solution is a must. We know the EML format is supported by almost every email client. So, it is an easy and instant way for users to export or download Gmail emails to EML file format to move emails to another mail client.

    We will elaborate on two solutions: a manual method and an automated Gmail backup tool to save emails from Gmail accounts to EML file formats. Know the stepwise working procedure and find the easiest way to save emails from Gmail to EML files by reading this write-up.

    Table of Content

    What are the advantages of saving Gmail emails to EML format?

    EML format is widely supported by various email clients, including Incredimail, Thunderbird, Microsoft Outlook, Apple Mail, etc. That is why it becomes beneficial for users to export Gmail emails to EML file formats; let us understand some of them.

    • When users export Gmail emails to EML format, it helps them to quickly move their data to other email clients that support EML format.
    • Moreover, users can also access their email offline if they have all their Gmail emails in EML format.
    • Having Gmail emails to EML files allows users to avoid unexpected future chaos and securely keep a backup of their emails.
    • As an EML file stores a single email, it is easy for users to share with others.
    • The EML file is organized in folders and sub-folders, giving better control over the emails even without the internet.

    These are the benefits of why users look to export Gmail emails to EML file format. Now, we will focus on the possible solutions to effectively save Gmail email to EML format.

    Ways to save Gmail email to EML file format

    Here, we look at the manual and professional third-party solutions. In the manual method, we use the Gmail email client to download Gmail email to EML format. Then, we will share an alternative solution, the Shoviv Gmail Backup and Restore Tool, to accomplish this task rapidly.

    Now, we first explore the manual method of exporting Gmail emails to EML formats using the Google Gmail web-based application.

    1. A manual way to download Gmail emails to EML files

    This method will help only download a single email to EML format at once. However, the steps are easy, and even new users can follow them without any hassle to export Gmail emails to EML formats. Let us share the stepwise guide:

    • Go to your web browser, search for Gmail and login to your account.
    • Then, navigate to the folder and open the email that you want to export in EML file format.
    • After that, tap the three dots and hit the Download message button from the options.

    These simple steps will take your Gmail email into EML format. Before using this solution, note that you can only save a single email to EML format at a time.

    Limitation: Suppose you have 1,000,000 emails to save into EML format; then you need to repeat these steps 1,000,000 times to download all Gmail emails to EML files. So, this process can become time-consuming and confusing for users when using the manual solution.

    Let us move to the alternative tool for exporting Gmail emails to EML format without any hurdle.

    2. Shoviv Gmail Backup and Restore Tool to save Gmail email to EML format

    Users can use the Shoviv Gmail Backup and Restore Tool to export Gmail emails to EML without any limitation. This software allows users to export Gmail emails into various file formats, including EML, PST, MSG, MHT, etc. It works on the job-based process, allowing users to process multiple backup/restore jobs at once.

    This software also allows users to save their Gmail emails in PST format without any limitations on size and email count. New users can also save Gmail emails in EML format using this professional software.

    It offers a filter option that users can use to choose selected items from Gmail using the date and folder criteria. This tool also has a default incremental export feature to resume the interrupted process and prevent data from duplicating items.

    Guide for exporting Gmail emails to EML file format

    • Open the Shoviv IMAP Backup and Restore Tool (Shoviv Gmail Backup Tool).
    • Then, select Gmail from the left-side options.
    • Enter your Gmail address and App Password. (click here to learn how to create an App Password)
    Create a backup for for Exporting Gmail Emails to EML file format
    • Click the Backup Directory button, enter the job name, select EML file format from the options below, and hit the Add new Backup Directory option.
    Choose Export format
    • Give a name to the Backup Directory and tap the Browse button to select the location where you want to save the resultant EML files. Then, click the Ok button.
    Backup directory name and path
    • Use folder and date-wise criteria to filter items for adding or removing from the process. After that, check the Examine Already Exported Items in All Folders option to prevent duplicate items.
    Filter your backup data
    • Next, kindly move to the Scheduler option and check the Start immediately after creating the job option to run the job once it is done.
    Start backup job immediately of run for later
    • You can also choose the Job Schedule option to set backup on a daily, weekly, monthly, or specific date and time.
    Schedule your files backup as you wish
    • Then, modify other settings, like thread item count, max login attempt, etc. and click the Create Backup Job button.
    Thread count
    • The tool will start saving Gmail emails to EML formats.
    Start exporting Gmail emails to EML
    • Go to the location you selected to save the resultant EML files and check if the data has been exported.
    Locate Saved EML files path

    It’s your turn now!

    This write-up has taught two proven solutions to export Gmail emails to EML file formats. Now, the decision is yours: Which solution do you prefer for downloading or saving their Gmail email in EML format? Professionals always recommend the Shoviv Gmail Backup and Restore Tool for a trusted and reliable approach. Moreover, users can also try its free trial version in their system to understand the stepwise working of the tool.

    The free trial version of this software permits users to process the first 50 items per folder from each folder of the Gmail account. This will make it easier for users to know the tool’s functionality and capability before having hands-on experience with its full version.

    Feel free to ask queries; our support team is available 24/7 to assist users who have any queries related to the software or their tasks.

  • How to migrate email from CenturyLink to Gmail?

    The current time is the time of new and updated technology that simplifies our daily routine tasks, such as email management, collaboration, etc. That is why most users search for information on how to migrate email from CenturyLink to Gmail seamlessly and accurately. The internet is laced with the different solutions available for transferring CenturyLink email to Gmail, but having an effortless approach for moving essential emails from CenturyLink is a must.

    The common reason behind this transfer is the user-friendly interface of Gmail and its advanced features. Moreover, Gmail is better at providing email security and preventing account from the scammed emails. On the other hand, CenturyLink webmail lacks better features, especially for email security.

    Table of Content

    CenturyLink and Gmail email clients: A Short Overview

    CenturyLink (now Lumen Technologies): CenturyLink webmail is an email service that allows users to manage their emails, collaborate and communicate with clients and colleagues. It is basically a telecommunication company. In addition, CenturyLink offers its email service to those who use its broadband or telecommunication services. It provides limited integration with other productivity tools and services.

    Gmail: Gmail is a web-based email client offered by Google. It is equipped with the latest features, like robust search capability, powerful security features, etc. Moreover, Gmail can easily integrate with other tools and services, including Google Docs, Calendar, Drive, and more. It provides free 15 GB storage for each account to save emails, drive data, and Google Photos.

    Why do users transfer CenturyLink email to Gmail?

    Gmail made users switch from CenturyLink webmail to it, as it offers better security features, a quick spam emails filtering option and many more. Let us discuss more of them to know why they transfer emails from CenturyLink to Gmail accounts.

    • The GUI of Gmail is better and more straightforward as compared to CenturyLink webmail.
    • Moreover, Gmail has advanced features that allow it to integrate with other services and productivity tools.
    • Each Gmail account gets 15 GB of free storage to manage their essential data, like emails, photos, files, documents, contacts, etc.
    • Gmail is a free email client, and most importantly, it is a universally recognizable and trusted solution.
    • It offers a powerful scam email filtration and security facility. That includes two-factor authentication, protection from phishing emails, etc.

    Users migrate CenturyLink email to Gmail for a variety of reasons. Above, we shared common reasons for moving emails from CenturyLink to the Gmail account.

    A free solution to forward emails from CenturyLink to Gmail

    This guide will focus on the two best practices that users can use to transfer CenturyLink email to Gmail accounts. We will discuss the free manual method to take CenturyLink webmail data to the Gmail environment.

    Users must use the Gmail web-based email client to forward CenturyLink email to Gmail for free. The steps are as follows for manually running the CenturyLink email to Gmail migration task.

    • Log into Gmail using your account details.
    • From the right corner, choose the Settings icon and click the See all Settings option.
    free forward emails from CenturyLink to Gmail
    • Then, navigate to the Accounts & Import and click the Add a Mail account option.
    free forward emails from CenturyLink to Gmail2
    • After that, type your CenturyLink email address and hit the Next button.
    • Now, choose the Import emails from my other account (POP3) and continue with Next.
    • Enter your CenturyLink username and password. Then, tick the Leave a copy of Retrieved Message on the Server checkbox.
    • In the POP server, fill out pop.centurylink.net and tap the Add Account button.
    • Lastly, pick the No option and go with the Finish button.

    This method can be challenging for new users, as it only exports the INBOX folder from CenturyLink to Gmail accounts. It can take too much time, depending on the size of the emails you are moving from CenturyLink to Gmail. For a quick and effortless migration, users can read the upcoming section, where we will share a reliable and trusted way to move emails from CenturyLink to Gmail environments.

    Which is the best way to run the CenturyLink to Gmail Migration task?

    Shoviv IMAP to IMAP Migration Tool is the seamless way to migrate emails from CenturyLink to Gmail. This software works without limitations and processes items from all CenturyLink folders to the Gmail account. It keeps the folder hierarchy and data integrity of emails when migrating from CenturyLink email to Gmail. Moreover, this tool has a simple user interface, letting new as well as experienced users easily access it and complete this transfer task.

    This software offers a filter option that users can apply to include or exclude desired items from CenturyLink when moving into the Gmail account. It has a default Incremental Export feature to avoid duplicity and resume the process from where it was stuck last. In addition, users will not be restricted from processing large items using this professional CenturyLink to Gmail migration tool.

    Steps to migrate from CenturyLink to Gmail

    • Install and run our IMAP to IMAP Migration Tool.
    • Then, click the Source Connection tab to connect to the CenturyLink webmail.
    CenturyLink to Gmail1
    • After that, tap the Add icon and create a project for the CenturyLink to Gmail migration.
    CenturyLink to Gmail migration
    • Enter a project name, click the Add button to add a mailbox, and type other required details, like server address, mailbox email, password, etc. Then, click the OK button.
    CenturyLink to Gmail migration job3
    • Connect to the target and click the Add button to create the target project.
    • Select the Add button to add a mailbox and enter needed details such as mailbox email, port number, password, etc. After creating the target project, hit Ok.
    CenturyLink to Gmail migration3
    • Go to the Migration Job tab to create a CenturyLink to Gmail migration job.
    CenturyLink to Gmail migration4
    • Then, enter the job name, select the source and the target (that we created in the above steps), select an email address and click the Next button.
    migrate email from CenturyLink to Gmail5
    • Map the source mailbox to the target mailbox, and after mapping, click Next.
    migrate email from CenturyLink to Gmail6
    • Apply filters by the date and folder to avoid undesired items or add only selected items in the process. Tap Next.
    migrate email from CenturyLink to Gmail7
    • After that, set up other options like mailbox thread count, failed items limit, etc., according to your need and click Next.
    migrate email from CenturyLink to Gmail8
    • Schedule the Migration Job if you want; it allows you to perform migration on a regular basis, like daily, weekly, monthly or at any specific day and time. Click Ok.
    migrate email from CenturyLink to Gmail9
    • Review the CenturyLink to Gmail transfer settings and tap the Finish button.
    migrate email from CenturyLink to Gmail10
    • Once done, run the job to migrate email from CenturyLink to Gmail without limitations.

    Bringing It All to a Close!

    This professional write-up has described two solutions to migrate CenturyLink email to Gmail accounts above. The one from the above-shared solutions is a manual method, which can be time-consuming and fail to migrate all folders. On the other hand, the other solution is the Shoviv IMAP to IMAP Migration Tool, a simple way to transfer CenturyLink email to the Gmail environment.

    This software also has a demo version that users can use on their system to learn more about its functionality and working procedure. Its free demo version can process the first 50 items from each folder of the source mailbox to the target.

    Have any queries regarding the task and our IMAP to IMAP Migration tool? Contact our technical support team, which is available 24/7 to assist users worldwide.

Enter To Win
Privacy Overview

This website uses cookies so that we can provide you with the best user experience possible. Cookie information is stored in your browser and performs functions such as recognising you when you return to our website and helping our team to understand which sections of the website you find most interesting and useful.